Easter eggs are boldly going, where no Easter egg has gone before… I wanted to do something super cool with our Easter eggs this year. Every year I buy the Paas kit and every year my kids over mix colors and create poopy brown Easter eggs. Not this year!! I had seen something a while back that said to use gel food coloring to dye eggs, because it produced awesome bright colors. I have a ton of these type colorings in my cabinet. So I tested it out and it makes the most vibrant colors I’ve ever seen! I had an idea in mind to create galaxy eggs, but I wasn’t sure if it would work. Well, it totally did and then some! I think I stumbled onto the coolest Easter egg design ever, by total accident…

Supplies:
- Vinegar
- Plastic cups
- Toothpicks
- Various gel food coloring {make sure one of them is black}
- Eggs
To begin, fill your cups with 1/2 – 3/4 cup warm water. Add to that 1 tbsp vinegar. Squeeze or use toothpicks to add gel coloring. I used about 3 drops from the squeeze bottles or the equivalent of 1/8 tsp from the containers. Just use a toothpick to scoop it out.

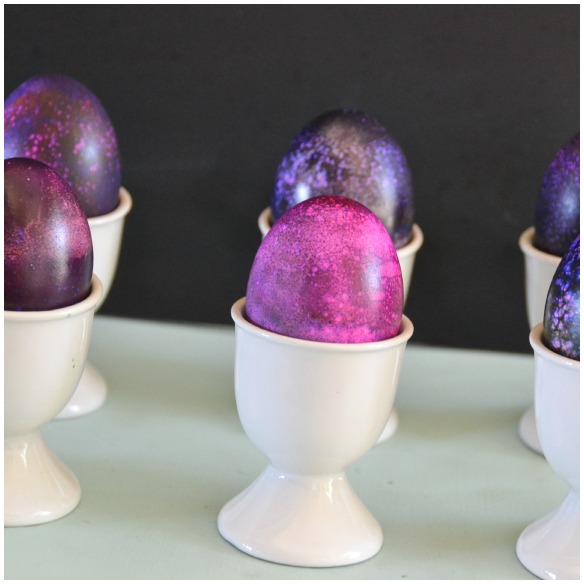
Before I tell you the process, you have to know that no two eggs are going to be alike. This is not a tutorial that will replicate the eggs I made shown in this post. It will however, produce similar or possibly even better results. So if you’re okay with that, toss in your eggs. The longer you let them sit, the more vibrant the color. I used all colors, green, turquoise, purple, pink, orange, yellow. I just moved them from one cup to another until it produced a color I liked. I basically just layered the dye one on top of another. I always made sure to dunk the egg in either black, blue, purple, or green as the final color. I typically let it sit there for about 10-15 minutes. If you want the “galaxy” color of deep purple/maroon, then let your egg sit in the black dye for 30 minutes or more.


Most of the speckles happen on their own. You’ll notice some of your eggs have more than others. It’s completely random, but makes them that much cooler. Almost all of the design takes place in the drying process. I dried the big side down first, then flipped it to the narrow part of the egg.
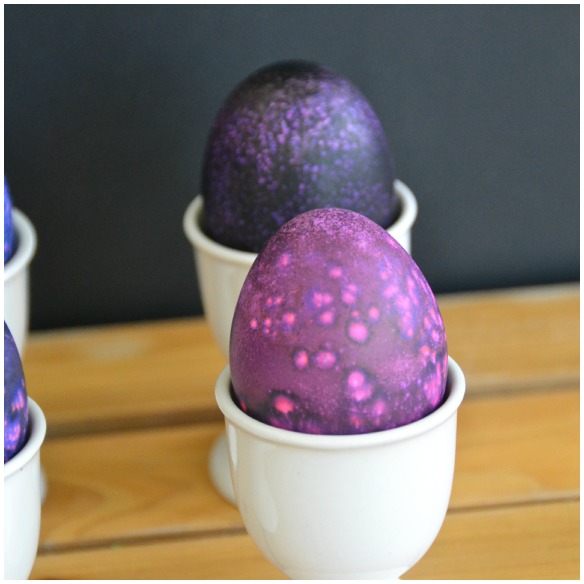
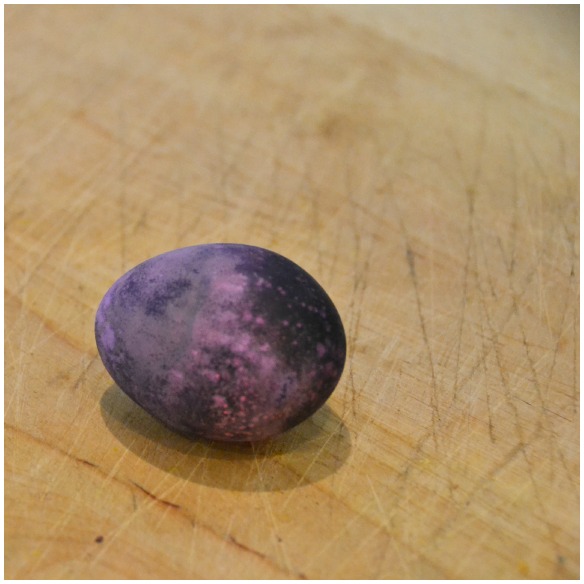
I made the speckles on some of my eggs by sweating them. By sweating, I mean chilling already dyed eggs in the fridge, then moving then out to the counter. The difference in the temperatures makes the egg sweat. When this happens, just blot a paper towel on the egg and it will remove the condensation beads and the top layer of dye, thus producing the speckles. Some of the eggs might sweat too much. Not to worry though, just wipe it off and toss in the dye again. You really can’t go wrong.
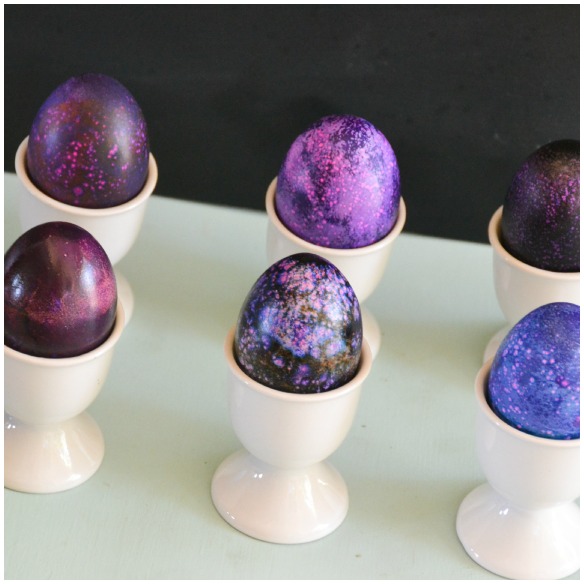
To get that milky way look, I simply took a dyed egg and twisted it in a paper towel, rubbing off some of the dye. Don’t overdo it, just a couple of turns in the paper towel, then toss it back in the dye bath.
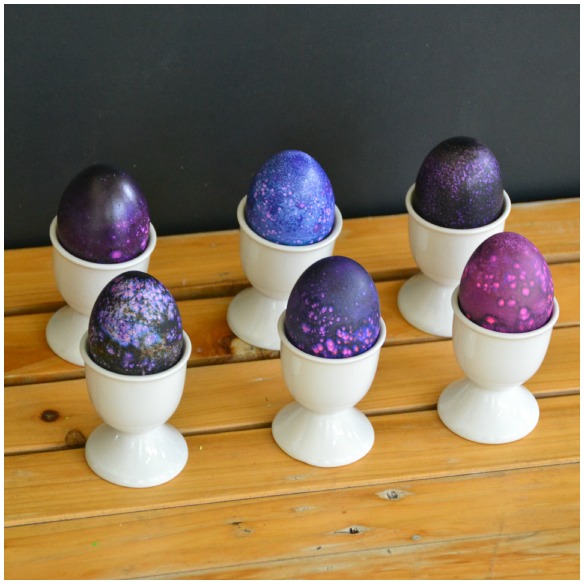
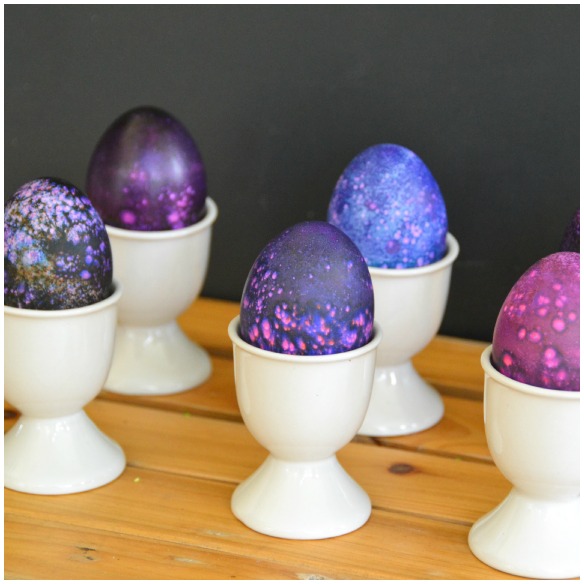
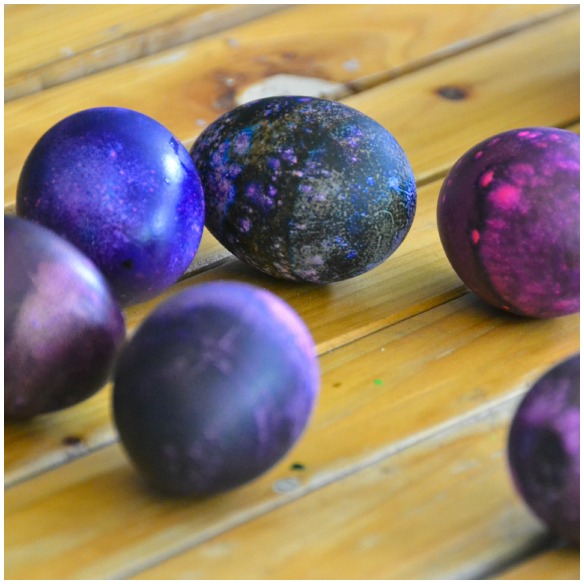
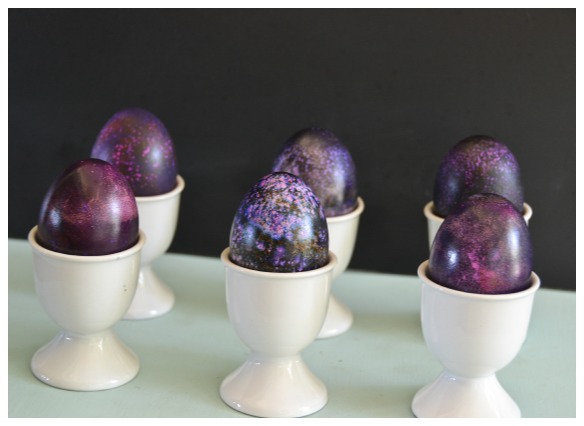 Are these out of this world or what? The best part is, no poopy brown color!! Like I said, you can’t go wrong here. Just give it a try and see what cool galactic eggs you can create!
 Brenda
April 16, 2014 at 4:07 pmWhat a great idea with impressive results. Thanks for sharing!
 krisha
April 16, 2014 at 4:16 pmThank you and you’re welcome! 🙂
 Gina
Gina
April 17, 2014 at 8:29 amThese are amazing…can i ask a stupid question….did you use real eggs?
thanks
gina
 krisha
April 17, 2014 at 9:04 amHi Gina!
Thank you! Yes, I used real eggs. 🙂
 Pete
Pete
April 19, 2014 at 12:18 amHard-boiled? Did you dry them in the eggcups? Ta!!
 Nickel
April 19, 2014 at 8:31 pmHey, I’m about ready to try this, but I was just wondering if there were any tips one making sure that the colours don’t turn brown? Cheers!
 krisha
April 19, 2014 at 10:45 pmI’d stay away from yellows and greens. Purples, pinks, blacks, and blue worked best.