


 Recently, I had some giant pieces of cardboard laying around, that I just couldn’t part with. You know, it’s not everyday you have giant pieces of cardboard, so I asked Jacks, “Do you want to make a giant moon?” And that’s exactly what we did!
You’ll need the following supplies for this project:
Giant cardboard
Plastic grocery bags
Masking tape
Cereal boxes or other thin cardboard
Paper towels
Acrylic paint (Black, white, grey, glow in the dark)
Paintbrushes
Mirror hanging wire
Hot glue
Scissors
Newspaper
Paper mache paste (equal parts flour/water)
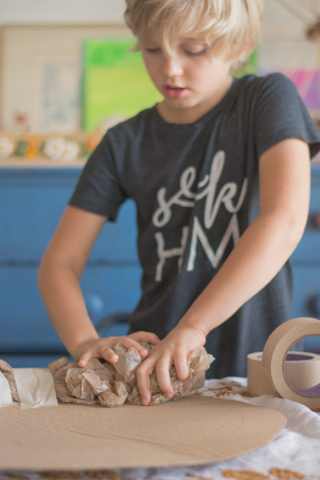
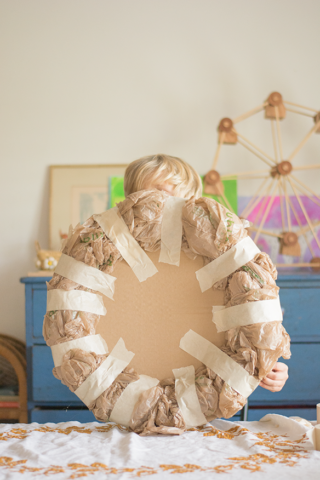
To start, draw a large circle on your giant cardboard and cut out. Next, begin shaping your moon by building layers of plastic grocery bags. Attach bags with masking tape. We started with a ring around the outer side of the circle and just kept building. We ran out of grocery bags, so we started using kraft packing paper, the kind that comes with your Amazon packages. I love that stuff and keep it always! Keep layering and building until you have a small hill. Make sure the entire moon is covered in masking tape. If you have any openings, then the paste will leak through and you could end up with mold issues. Keep taping!
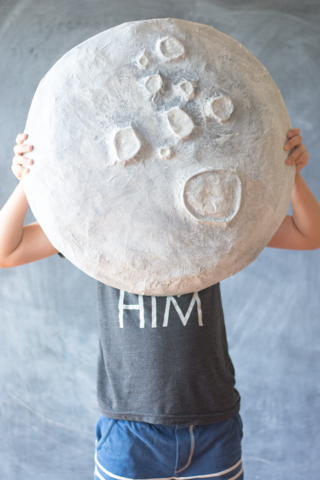
I had Jacks look at pictures of the surface of the moon to get and idea where he wanted to put the craters. Cut think pieces of cardboard from cereal boxes and loosely form a circle. Attach to the surface of your moon with tape. Randomly place other sizes on the surface, until you have enough to your liking. Fill the craters with crumpled paper towels, then tape over the entire crater, so nothing is exposed.
Mix up a batch of paper mache paste and start adding layers of newspaper. We did about 3 layers total. You’ll need to let it dry thoroughly between layers. We placed it out in the sun and it was dry within 30 minutes.
Once all layers have dried, add the hanging wire. Poke two holes on the back side of the moon, then add the wire. I kept the tension pretty tight, because I didn’t want it to lean out from the wall. Once you have the correct tension, secure the wire by adding hot glue to the hole and the surrounding area. Leave to dry.
Now, it’s time to paint! First add a base coat of white paint. After that, there is no rhyme or reason to the paint method. Play around with mixing your colors. If you look at pictures of the surface of the moon, there are dark and light areas. Try to replicate that look. A good tip to pick up all the bumps and imperfections on your moon is to do a final dry brush coat, with whatever color you choose. For a final fun touch, we added dots of glow in the dark paint. It really does glow! Just have fun with it, no two moons are going to be the same!
When everything has dried, hang your moon in your room!