


If you have been reading my blog for a while, then you know I like to make use of things we have on hand. We have some resident ducks that we feed oats to from time to time and I’ve been saving the oat containers, as I’ve had this idea in my head for a few months. Normally, I will have the whole project planned out in my head. Depending on the complexity of it, I might even do an example, just to put my ideas to the test. Not this time. I decided just to wing it. It took a bit longer, because we ran into a couple of hiccups along the way. That’s okay, it worked out for the better, as my original idea was something more along the lines of a haunted tree stump for Halloween.
For this project you’ll need the following:
Tree stumps
Oat containers – I used the small size, but large would be fun!
Brown packing paper – I save the packing material from all my Amazon packages.
Glue – we used both sticks, liquid and a low temp glue gun.
Scissors
Acrylic paints
Paintbrushes
Mod Podge
Cardboard
Thin cardboard – like cereal box cardboard
Creatures
Plastic grocery bags
Masking tape
Thin cardboard
Pipe cleaners
Newspaper
Paper mache paste – I always use equal parts flour and water.
Acrylic paints
Paintbrushes
Mod Podge
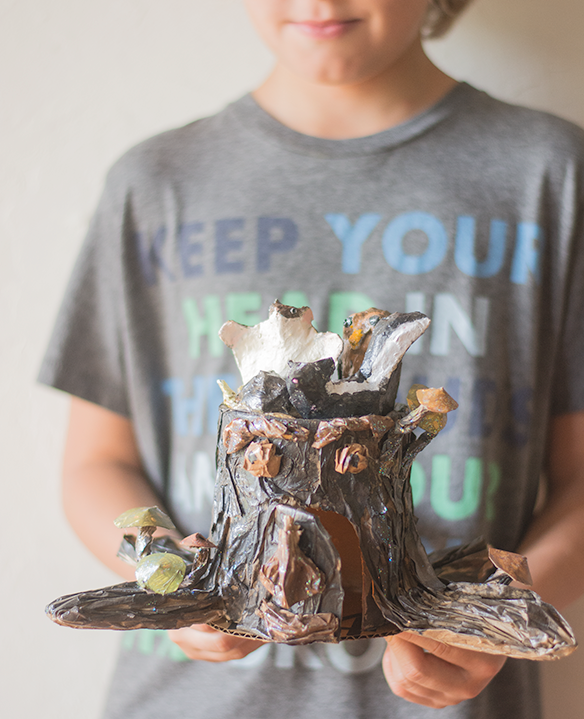
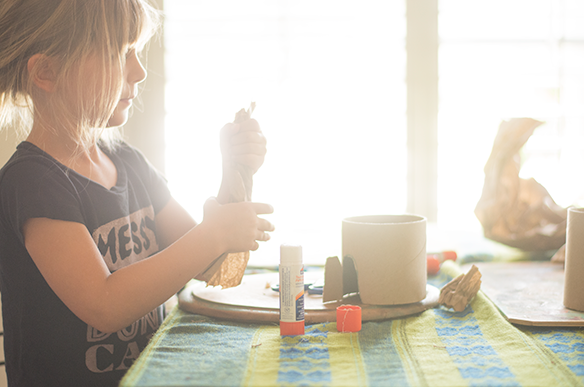
First thing you’ll do is cut your oat container in half and keep the half with the bottom. That will be the top of your tree stump. Mark where you want a door and cut 3/4 the way around, leaving 1/4 intact for a hinge. A window would be a fun addition, however I didn’t think to add one until we were too far into the project. Trace around the bottom of the tree stump on a piece of cardboard. Cut out and attach with the glue gun.
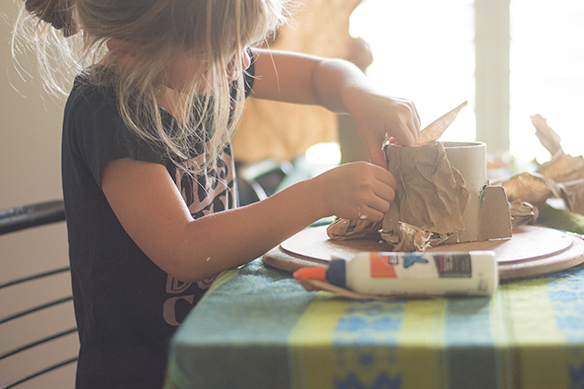
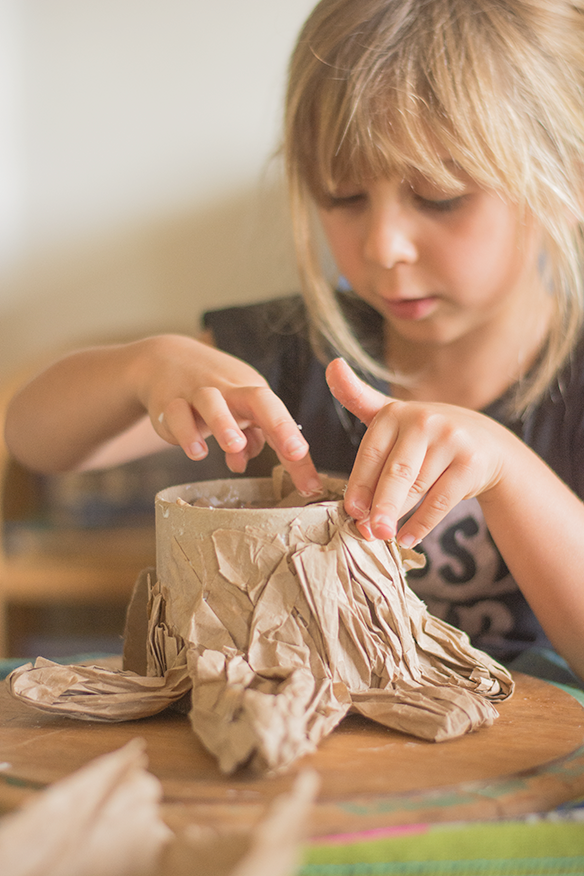
Next you are going to start covering the container with the brown packing paper. There really is no right or wrong way to do this. The only thing I would suggest is not using to big of a piece. It will add too much bulk and makes it hard to glue down. At this point, you are just covering around the stump, the top and the door. After that has set, you can make the roots by taking a length of packing paper and folding it over onto itself. Then twist it a little until you have a shape that resembles a root. Attach with glue.
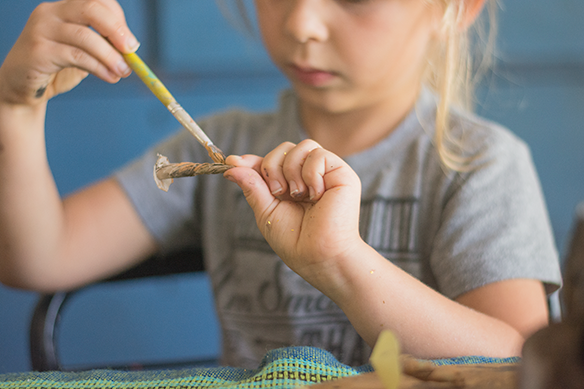
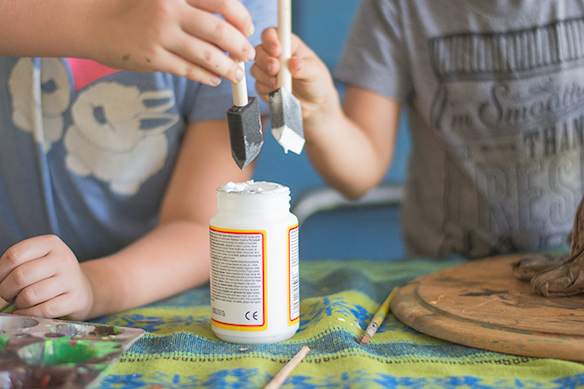
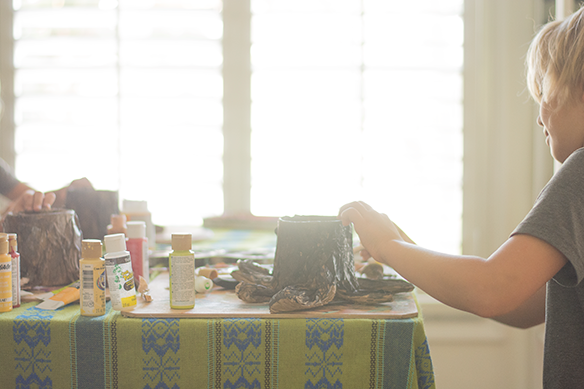
After all the glue has dried, paint the tree stump. We added mushrooms made from twisted packing paper and circles cut from the cereal box cardboard. These are easily attached using a low temp glue gun. Now you can make the face for the door out of the same packing paper and paint. We did brows, eyes, a nose and a mouth, then attached with the glue gun. Once the entire stump is as you like it, give it a couple of coats of Mod Podge and leave to dry.
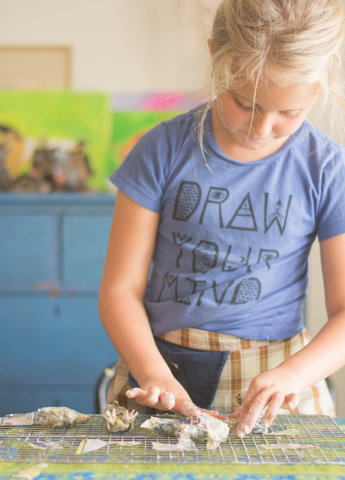
Now you are ready to make the creatures that will inhabit your enchanted tree stump. It was a lot of fun watching them come to life. They worked really hard and Momma helped out on a few. I had them look at pictures and use their Schleich animals as guides and inspiration. This really helps to get the basic shape of the animal. And by basic, I mean basic. I tell them to just look at the shapes of the animals and try to copy that. All details can be added later. There was a little bit of frustration from Annie, as there always is, but in the end she powered through with a tiny bit of help from me. We ended up with an Owl, a skunk, a flying squirrel and a snail from Jacks. Savannah made a jack-o-lantern, a snake, a bunny and a ruby-throated hummingbird. I helped Annie create her Monitor lizard (lol), Bear and mouse.
To start making the creatures, shape the pipe cleaners to the basic shape of your animal. To give the shape form, slowly add crumbled plastic grocery bags and attach those with masking tape. We used a similar method with these faux taxidermy animals we did last year. The cereal cardboard makes for nice ears and wings. Feet were easily made with rolled up masking tape. After you have the basic form completely taped up, you are ready to paper mache. We did two coats of paper mache, baking in the oven between coats. You can begin painting once they are completely dry. After, add a coat or two of Mod Podge.
We added some battery operated flickering tea lights for a enchanting glow within. Annie loves to make up shows and stories with all of them. I love when art is interactive!! These took some time, but were a lot of fun to make and I very much enjoyed watching them bring my idea to life!