• Skip to primary navigation
  • Skip to content
  • Skip to primary sidebar
  • Skip to footer

This HomeSchooled Life

Homeschooling Education with Adventure and Fun!

  • HOME
  • HOMESCHOOL
  • NATURE
  • Nav Social Menu

Tea Box Veggie Garden…

March 8, 2016 by krisha

DSC_6210DSC_6118-2DSC_6129DSC_5838DSC_5812DSC_5865DSC_5894DSC_5890DSC_5908DSC_5855DSC_5954DSC_5888-2DSC_5950DSC_5794DSC_6081DSC_6103-2DSC_6143DSC_6136 DSC_6206DSC_6146 DSC_6186DSC_6159
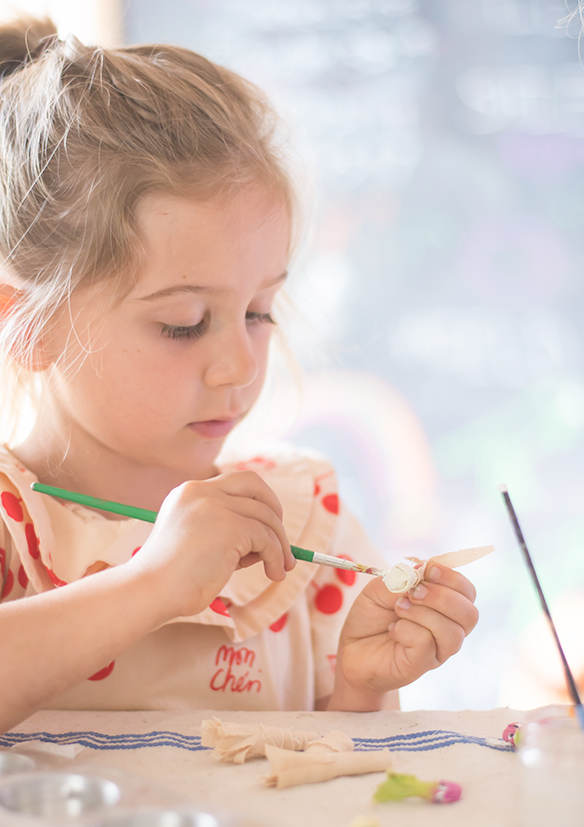
Warning: This might be my longest post yet. This is absolutely one of my favorite art projects I’ve done with my kids. It’s a little involved, but once they get going, they find their rhythm and are well on their way to making this tea box veggie garden. My youngest, who is 5, needed more help with the actual construction of the veggies. My oldest 8 and 7, just needed a little guidance and reassurance that their veggies didn’t have to look like Mom’s. Whenever I set up art projects, I always have an example for them, that I’ve created. I remind them, that it’s only there so they can see what the end product will be. I always insist that their project be their own and it shouldn’t look like mine. However, they are kids and sometimes we have art drama. Luckily, we were able to move past it pretty quickly and they were all very pleased with their own little gardens.

First, gather your supplies:

Muslin fabric
Brown fabric
Paper towels
Acrylic paints
Glue
Scissors
Paintbrushes
Toothpick or wooden skewer
Batting
Tea boxes

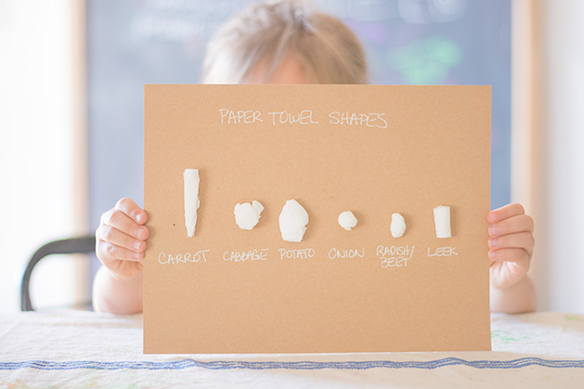
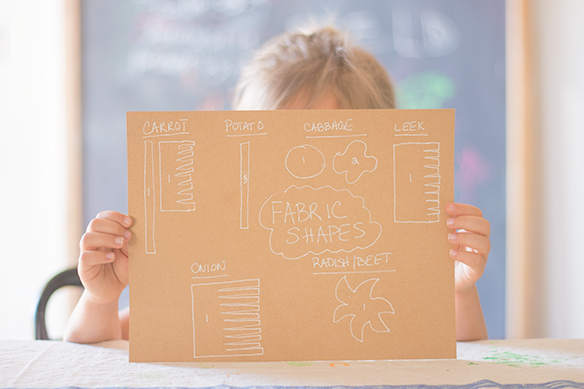
To start, you can review the paper towel shapes and fabric shapes chart in the pictures above. I made these to only serve as a guide for my kids. It isn’t set in stone. Please, by all means, encourage creativity. At one point, Jacks ventured off on his own and made a little garlic guy for his garden, without any instruction from me. It might also help to have the actual vegetables there, as visual guides. Especially with younger artists. Anyway, please use the charts I made at your discretion.

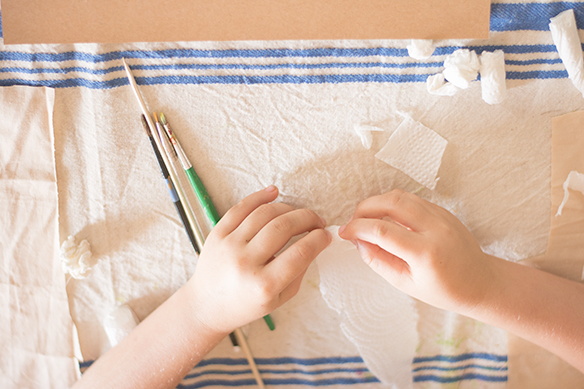
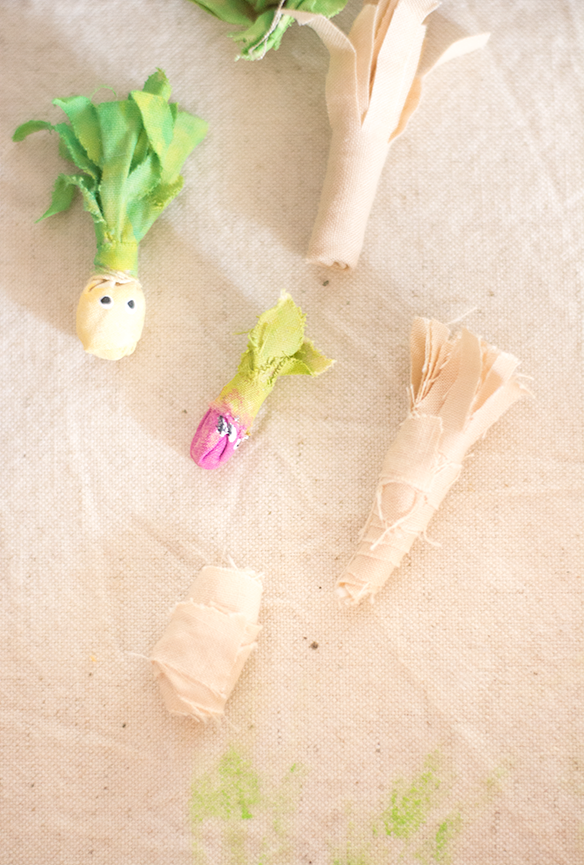
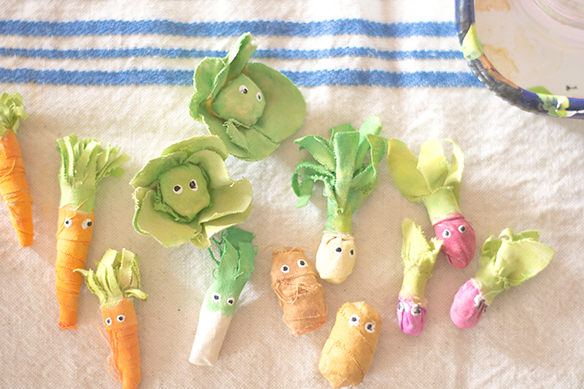
After reviewing the charts, start making your paper towel shapes. We made potatoes, leeks, onions, cabbage, beets or radishes, carrots, and Jacks made a garlic. Once you have all your shapes, set them aside and begin cutting the fabric shapes. After cutting all the shapes, you can start assembling the veggies. I’m going to try and be as descriptive as possible, so you can see how we covered the paper towels in our fabric. Let’s break it down by veggie, shall we?

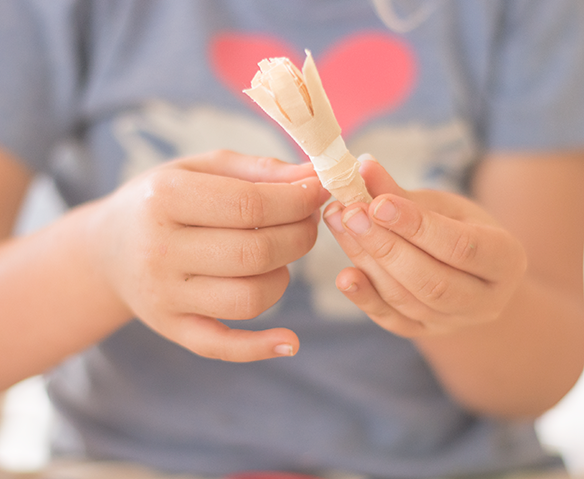
Carrot: Cut 2 – 3 long, thin strips for the base of the carrot. For the carrot top, first, start by cutting a rectangle. Fold the rectangle in half, lengthwise and cut fringe, careful to not cut all the way to the fold. To assemble, add glue to the carrot top, wrap the fringed fabric around, and secure with more glue. Then, begin wrapping your long strips from the bottom of the carrot, all the way to just over the base of the carrot top. Secure with glue.

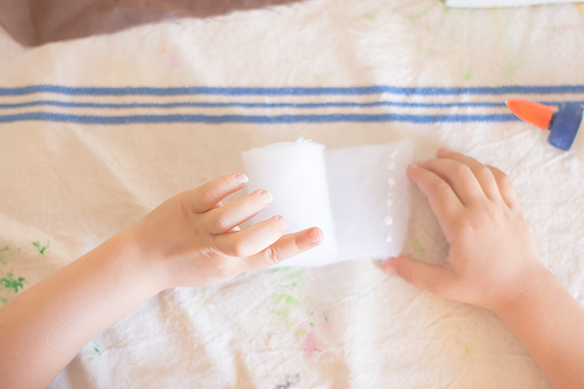
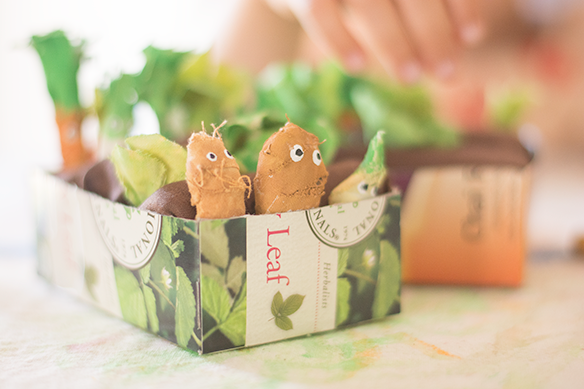
Potato: Just like the carrot, cut thin long strips. I think I showed three in my chart, but it will all depend on the size of your tater! This guy is pretty easy. You just wrap him up, mummy style, until there is no paper towel showing. Secure the ends with glue.

Leek: Cut a rectangle shape. Down one long side of the rectangle, cut fringe, but not all the way down. This one is a little tricky to assemble. Place your paper towel leek at the edge on one of the short sides and start rolling. When you start rolling, grab the long side (the one without the fringe) and pull up, so the bottom of the leek is covered. As you roll, keep that long side folded in. When you reach the end, take one of the leek fringes and wrap around the neck and secure with glue.

Onion: The onion is pretty much identical to the leek. The only difference is you start with a larger rectangle.

Cabbage: Cut a circle, big enough to cover the head of your cabbage. Then cut two shapes, that loosely resemble a flower. Maybe they look more like an amoeba? Glue those together, then onto the head of cabbage.

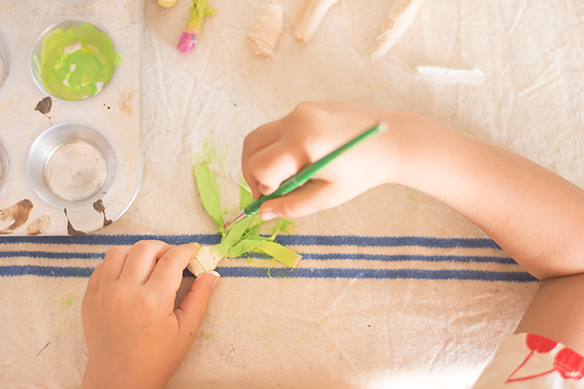
Beet/Radish: Cut a pinwheel shape of sorts. While holding fabric, place radish in the center, standing up. Grab the leaves and gather up, to cover radish. Take one of the leaves and wrap around the neck and secure with glue.

I know some of the descriptions might be a little hard to follow. But, really you can do it however you want. I just made these up and it worked. You might discover a better way!

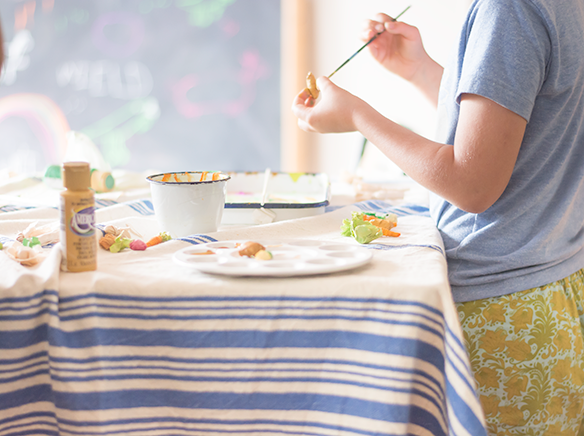
Now comes the fun part…painting! My only instruction for the painting is to try and cover all parts of the fabric. Also, blending colors is always fun! You’ll find that some of your fabric might start to get stringy during the painting phase. Don’t worry, it just looks like roots. If it gets too crazy, just give them a little trim. After painting, you can add eyes using the toothpick or wooden skewer. This was all my son’s idea. My original version did not have eyes. I loved it! So we added eyes and the garden came alive, so to speak.

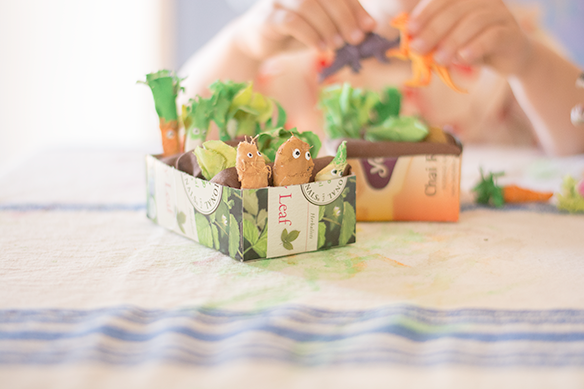
After all your vegetables are done, you are ready to make the garden bed. Depending on your tea box, you should be able to get 2 garden beds from one box. Start by measuring an inch from the bottom and marking a guide all the way around the tea box. Next, cut off the bottom. Repeat the same steps for the top of the tea box.

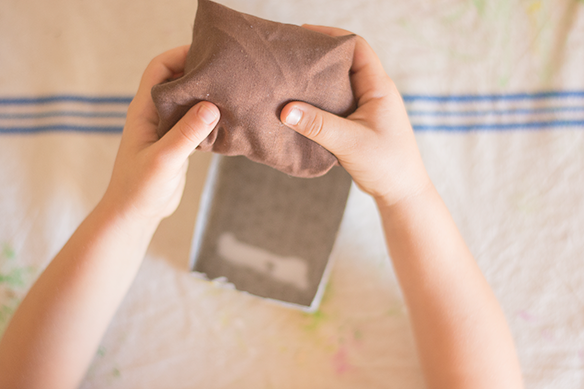
Using your tea box as a guide for width, cut 3 strips of batting approximately 7 inches long. Roll each strip and secure the end with glue. Next, cut 3 rectangles from your brown fabric. Don’t cut them too small, we cut ours at 7 in L x 4 in H. Place your batting roll at the center of one of the long edges. Roll, until it’s covered and secure the end with glue. Grab one end of the brown fabric and fold in and glue. Repeat with the remaining brown fabric end. Add glue to the tea box and place brown fabric roll, seam side down, and secure to box. Repeat for remaining 2 fabric rolls.

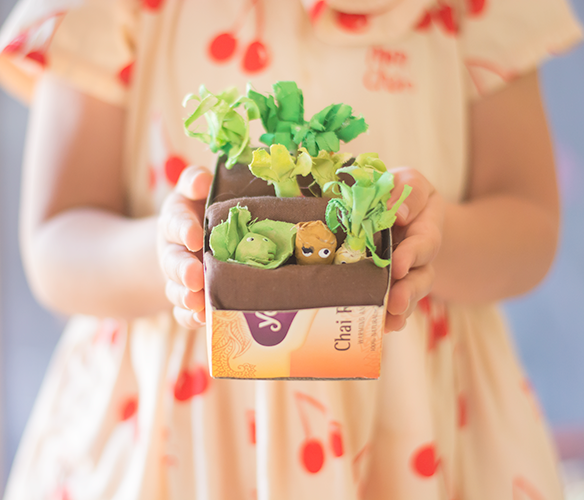
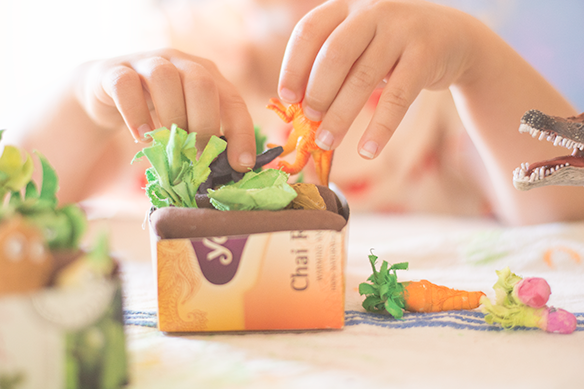
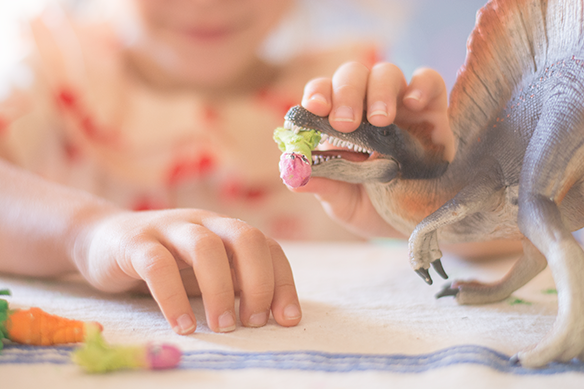
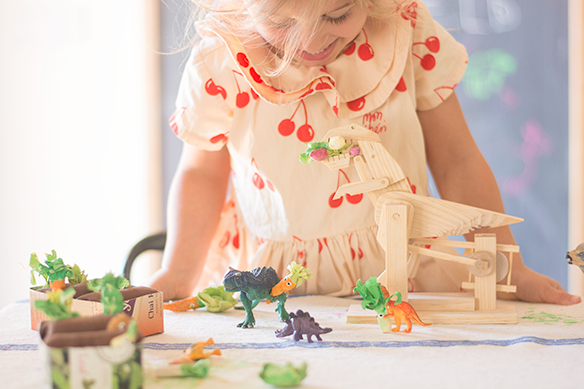
Whew…I hope you got all that. Remember, if you didn’t, just improvise! After all the paint and glue has dried, it’s time to plant your veggies!! They can be planted over and over again. Annie, invited her T-rex’s and other meat eating dinosaurs to her garden. Turns out, they like their veggies, too!!

Filed Under: MAKE, Tutorials

Previous Post: « Start Creative Doodle Books…
Next Post: Cardboard and Embroidery Necklace… »

Reader Interactions

Primary Sidebar

Lets Connect!

  • Facebook
  • Instagram

Instagram

A boy and his chicken. A boy and his goat. ❤️ A boy and his chicken. A boy and his goat. ❤️ Oh yeah, we have a baby goat. We named him Walter. I wasn’t really looking for a goat just yet, but a sweet Momma was emotionally overwhelmed and was asking for help.  Walter had a difficult birth so he was unable to nurse and won’t yet take a bottle, so he is syringe fed every four hours.  Sitting with Walter, feeding him at 4 am.. I was reminded of all the baby feedings and I thought I don’t miss this at all. 😂 But he sure is cute!
We let Miss Maggie out to forage. She was living h We let Miss Maggie out to forage. She was living her best life scratching up all the worms. Too bad her peck isn’t strong enough to bust open all those sprouted coconuts. Whatever you’ve seen on tv, it’s not easy breaking into a coconut, promise.
Chasing caterpillars in trees and raising chickens Chasing caterpillars in trees and raising chickens is the childhood I dreamed  they would have for so long.  Just so grateful to God for giving me my heart’s desire, even though I did nothing ever to deserve it. ❤️
If there is an injured animal in need of help, you If there is an injured animal in need of help, you can bet it’s waiting on my kids to find it. This happens all the time. So it really came as no surprise upon arriving at the park the other day that Annie would instantly find a Mockingbird sitting on the ground unable to move. 

Annie: Mom, we have to help it.
Me: Of course, but we were supposed to go for ice cream after the park.
Annie: I would rather help the bird. 

After looking at the little guy, I could tell he likely wouldn’t make it. He died en route. Sterling Lance she named him as she does all her rescues, didn’t die alone under the tree. A few weeks ago it was Gloria, an injured dove I woke up to find in my garage in a makeshift habitat. And many more before her!

We returned Sterling Lance to the park and went for ice cream. Every kind of kid flavor available from cotton candy to birthday cake and this child, old soul and all,  requests, “One butter pecan cone, please.” I just could not love her more. ❤️
Last week we celebrated my first born turning 13. Last week we celebrated my first born turning 13. Bittersweet, of course, but aren’t they all? I was not prepared for the many changes in a young boy from 12 to 13. Especially the voice. I didn’t even see it coming. Oh how I miss his high pitched little boy voice. Just looking at pictures from his 12th birthday and comparing them to this one, the baby look has faded away and the beginnings of a young man are taking hold.  At 13 he stands nearly 5’8 and is my reacher for all the things. He is a good kid and a simple soul. For his birthday all he asked was for offshore fishing, a chocolate chip cookie cake, and a sushi dinner.  He got his first cell phone (no internet or social media), good books, art supplies, and handmade gifts and cards from his siblings. Happy 13th Birthday, Jacks! You were and always will be my best first baby. ❤️
What he lacks in chill, he more than makes up for What he lacks in chill, he more than makes up for in helping. He always wants to help with all the things. Though I could mostly get things done quicker on my own, it wouldn’t be nearly as good. ❤️
Happy Independence Day, America! We spent the day Happy Independence Day, America! We spent the day working on our property and catching snakes. I am blessed beyond measure to live in the land of the free, when so many are not. I am free to worship and praise God. Free to have babies. Free to homeschool them. Free to own land. Free to travel. Free to vote. There are people in this world who would give their life and risk it all for what I have. My freedom is not lost on me. ❤️
A little behind on posting. Savannah and Wyatt pai A little behind on posting. Savannah and Wyatt paintings from last month.
Far and away my most humbling child. I love you al Far and away my most humbling child. I love you all numbers! Happy 5th birthday (last Friday), my darling boy. ❤️
Lately, I’ve found myself reaching for my big ca Lately, I’ve found myself reaching for my big camera longing to record more of our story. It’s been put away for what seems like at least 2 years. I used to document days like this on my blog frequently, but much like my children, the seasons of life require different care. I can see the season changing again and it feels good to be in this familiar space of creating with these great loves of my life.
Have you started your book tablecloth yet? I start Have you started your book tablecloth yet? I started this ongoing project with my kids last year. It is a gift to my future self. Reading aloud to my children has been and still is one of the most simple and deepest bonding experiences I have been privileged to be apart of. It is a visual record of our reading time together. Even now just a year later, Im filled with so much joy remembering these stories and how we loved them.

Link in profile for anyone interested in starting one of their own. #readaloud #embroidery #book #booktablecloth #charlottemasonirl #handicraft #homeschool
Last month we closed on a 1923 island cottage on a Last month we closed on a 1923 island cottage on about 4 acres. We just visit for now, but when we do our hearts are so filled. Chickens and goats forthcoming. ❤️
For 2019 books read: Jacks 84, Savannah 92, and An For 2019 books read: Jacks 84, Savannah 92, and Annie 25. They are already setting reading goals for 2020 😍
Savannah celebrated her 11th birthday earlier this Savannah celebrated her 11th birthday earlier this month and I sort of dropped the ball on posting, but I couldn’t let December wrap up without saying something about my precious daughter. This girl right here is next level. She’s the girl who snuggles her bunny, even after he bit her moments before. She is unwavering in her love. She’s the girl who while stirring the rice, spills it all over the counter, but happily scoops it up and declares, “free samples!” She sees the good. She is non stop laughter. She is LOUD, people. She spends hours painting cards for others and if you’ve been blessed to receive one from her, it’s her whole heart on paper. Give her a cheeseburger and a book to read outside and you can call it good. She’s an absolute light in this dark world. I don’t deserve her, but thank you God for your graces and blessing me so. Happy 11th birthday, Savannah Smiles! ❤️
We bailed on a traditional Thanksgiving this year We bailed on a traditional Thanksgiving this year and instead feasted on the beauty of the Ten Thousand Islands. We explored the driftwood forests and found several rare shells. There were plenty of live shells to observe and Scruffy kept retrieving them from the water, but none were harmed. We found several washed up crab traps and the kids worked hard to rescue a stone crab who would have soon died like its cage-mates if not for their efforts. It was a Thanksgiving to remember for sure and I’m incredibly thankful everyday that we live in this wonderland of Florida. ❤️❤️❤️
follow on instagram
This error message is only visible to WordPress admins


Recent Posts

  • Soap Bottle Dolls May 4, 2020
  • A Book Tablecloth February 18, 2019
  • Book Party: Where the Red Fern Grows (Spoilers) February 1, 2019
  • An Artful Approach to Mapmaking January 29, 2018
  • Egg Crate Foam Puppet Box… May 30, 2017
  • Rookery Bird Swamp… May 19, 2017
  • Confetti Moon Valentines… February 1, 2017
  • A Hike in the Woods… December 30, 2016
  • Enchanted Tree Stumps… November 7, 2016
  • Chocolate Covered Clementine Pumpkins… September 24, 2016
  • Painting… September 3, 2016
  • Giant Paper Mache Moon… August 1, 2016
  • Soft Pretzel Letters… July 7, 2016
  • Camp Banners… July 5, 2016
  • Wyatt turns 1… June 20, 2016
  • Make Your Own Chewing Gum Kit… May 24, 2016
  • Paper Mache Prize Ribbons… May 12, 2016
  • Mote Marine… April 25, 2016
  • Highlight Reel… April 12, 2016
  • Cardboard and Embroidery Necklace… March 17, 2016
  • Tea Box Veggie Garden… March 8, 2016
  • Start Creative Doodle Books… March 4, 2016
  • Yarn Birds… February 15, 2016
  • Snail Pin Valentines… January 20, 2016
  • Faux Taxidermy Ornaments… November 6, 2015
  • Classic Cream Puffs… September 21, 2015
  • Handprinted Stationary Kit… August 31, 2015
  • DIY Confetti Blowers… August 14, 2015
  • Easy Broccoli and Cheese Quiche… July 15, 2015
  • Time with Annie… March 8, 2015
  • School on Captiva Island and the Best Beach Bucket… February 17, 2015
  • Yarn Wrapped Lollipop Valentines… February 12, 2015
  • A New Addition… February 6, 2015
  • Artful Blogging Magazine Feature… November 13, 2014
  • The Road to Homeschooling… November 5, 2014
  • Handmade Confetti Ghosts… October 27, 2014
  • We Made: Kid Art Pumpkins… October 20, 2014
  • Chocolate Trail Mix Lollies… October 6, 2014
  • In Search of a Passion Fruit Vine… September 28, 2014
  • Back to School… September 14, 2014
  • One Day I’ll Remember… September 5, 2014
  • We Made: Pom Pom Ponytail Holders… August 23, 2014
  • Catching A Katydid… August 19, 2014
  • Family Favorite Snacks: Chocolate Strawberry Sorbet Bars August 18, 2014
  • Happy 7th Birthday Jacks… August 11, 2014
  • Another Monarch Release… July 18, 2014
  • Kid Embroidered Pencil Pouch… July 11, 2014
  • Family Favorite Snacks: No Guilt Almond Joy Bites… July 9, 2014
  • Personalized Watercolor Postcards… July 2, 2014
  • Published In Mingle… June 29, 2014

Footer

Copyright © 2026 · Foodie Pro & The Genesis Framework