 I’m really big on my kids making ornaments for our Christmas tree. It’s so funny, how having kids changes your perspective. Gone are the days of my perfectly decorated Christmas tree and I wouldn’t have it any other way.
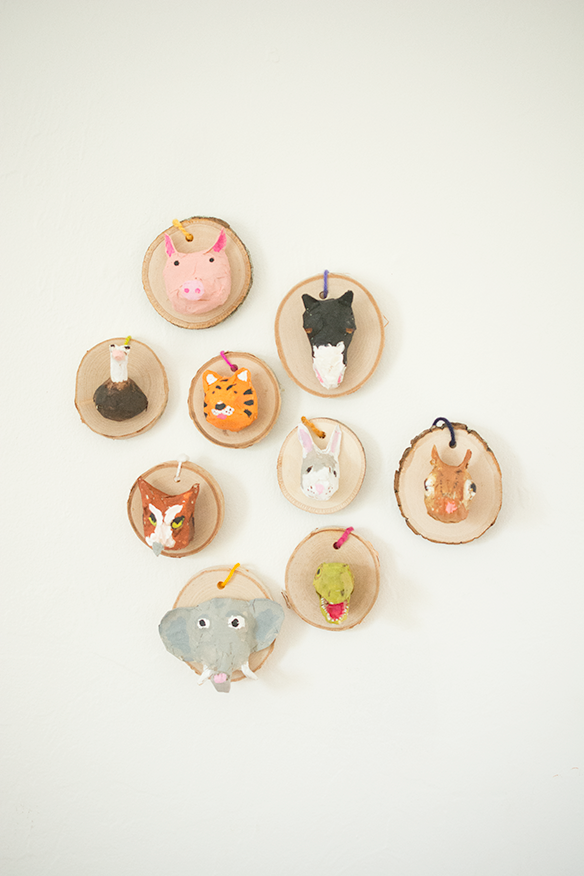
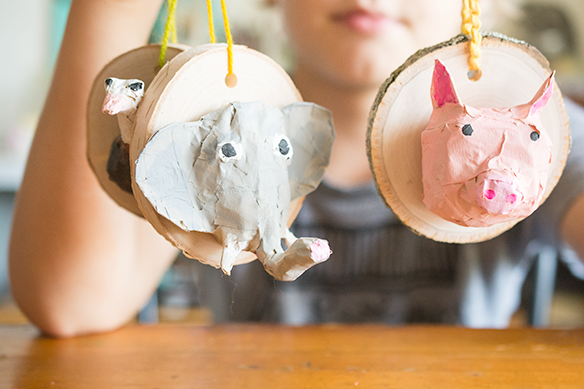
This year, I’m staying ahead of the game and getting all of our ornaments made in November. Well, I’m going to put forth a good effort anyway. First up, is our version of a faux taxidermy. These were so fun and so easy to make!
You’ll need just a few supplies:
Plastic shopping bags
Masking tape
Acrylic paints
Paintbrushes
Scissors
Glue
Pipecleaners (optional)
Cereal box (or any thin cardboard material)
Wood slices (I found mine at Michaels)
Yarn
Originally, I had planned to paper mache the ornaments. But, Savannah had recently made a puppet and instead of adding a layer of paper mache, she just painted right over the masking tape. I’m all for keeping things simple!
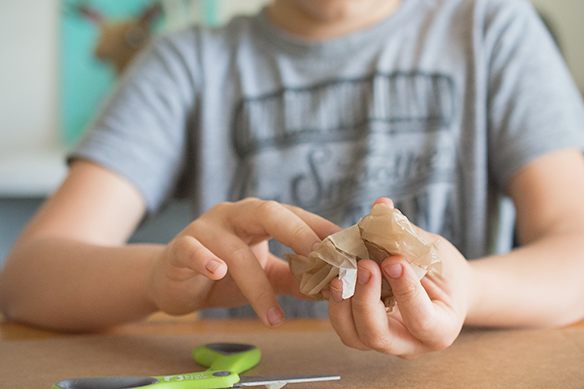
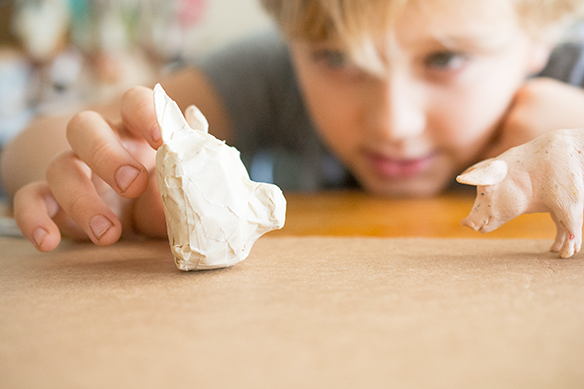
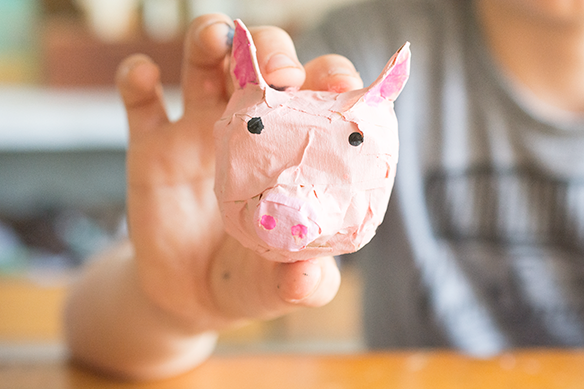
First, determine what kind of animal you are going to make. Start by forming a head shape with your plastic bag. You want to use a good bit of the bag, to give it substance. So make sure to cut off a good bit of the bag. Then, start rolling and tweaking it, until you have something that looks similar to your desired animal. Once you have your shape, wrap it in masking tape. Don’t wrap too tightly or it will decrease the size of your animal head. Keep wrapping, until the entire head is covered in tape.
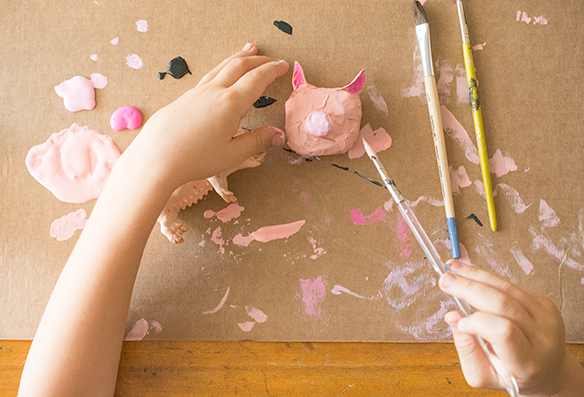
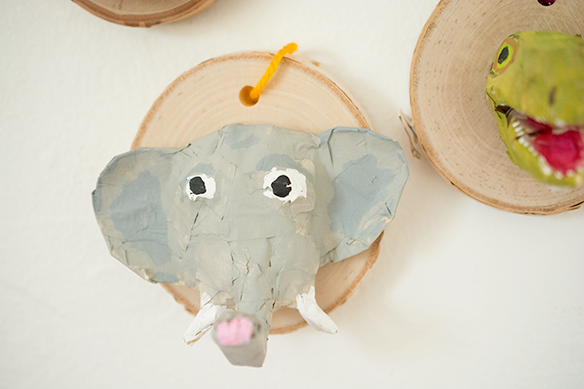
Next, add the eyes and ears. You can choose just to paint the eyes on, but if you want to add some dimension, then just ball up a little piece of tape and attach with a layer of masking tape. For the ears, we used a cereal box. We drew out simple ear shapes, cut them out, then covered them in tape, and attached to the head with more tape. For the elephant trunk and ostrich neck, I formed the shape I wanted with a pipecleaner, then wrapped a piece of the plastic bag around it and secured it with masking tape. Also, because the shape has some give, you can manipulate it and add indentations for eyes, nostrils, etc.
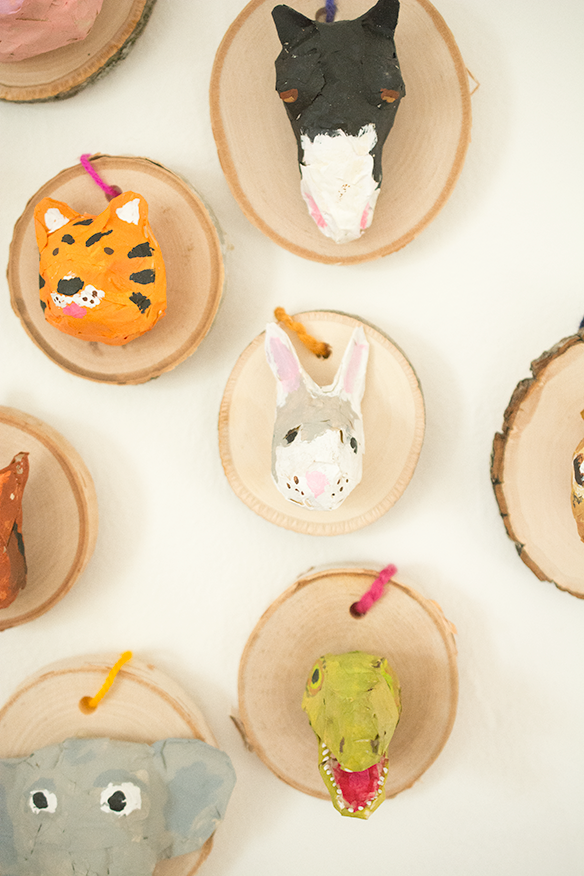
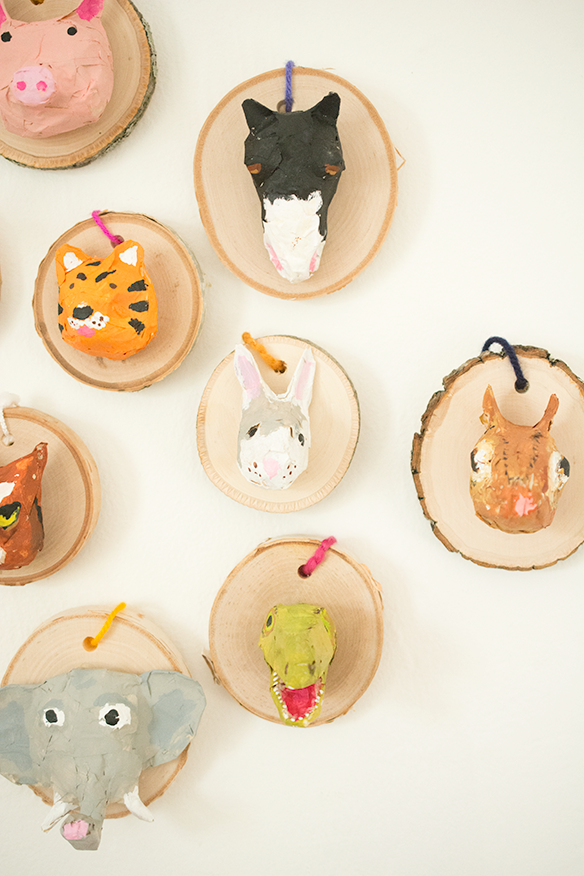
Once you have your head completed and covered in tape, you can start painting. This is where they really start to come to life. Depending on the paint color, you might need two coats. Set aside to dry. The wood slices do not come with a hole, so you’ll need to drill them out. After the paint has dried, glue the head to the wood slice, and thread a piece of yarn through the hole.
My kids loved making these! We made a pig, a horse, a bunny, a screech owl, a chipmunk, a T-Rex, an elephant, a tiger, and an ostrich. They are still making them! I think they turned out really cute and I can’t wait to get them on our tree. I love them so much, I think we are going to work on a bigger version for the wall.