• Skip to primary navigation
  • Skip to content
  • Skip to primary sidebar
  • Skip to footer

This HomeSchooled Life

Homeschooling Education with Adventure and Fun!

  • HOME
  • HOMESCHOOL
  • NATURE
  • Nav Social Menu

MAKE

Name Pillow…

September 22, 2013 by krisha

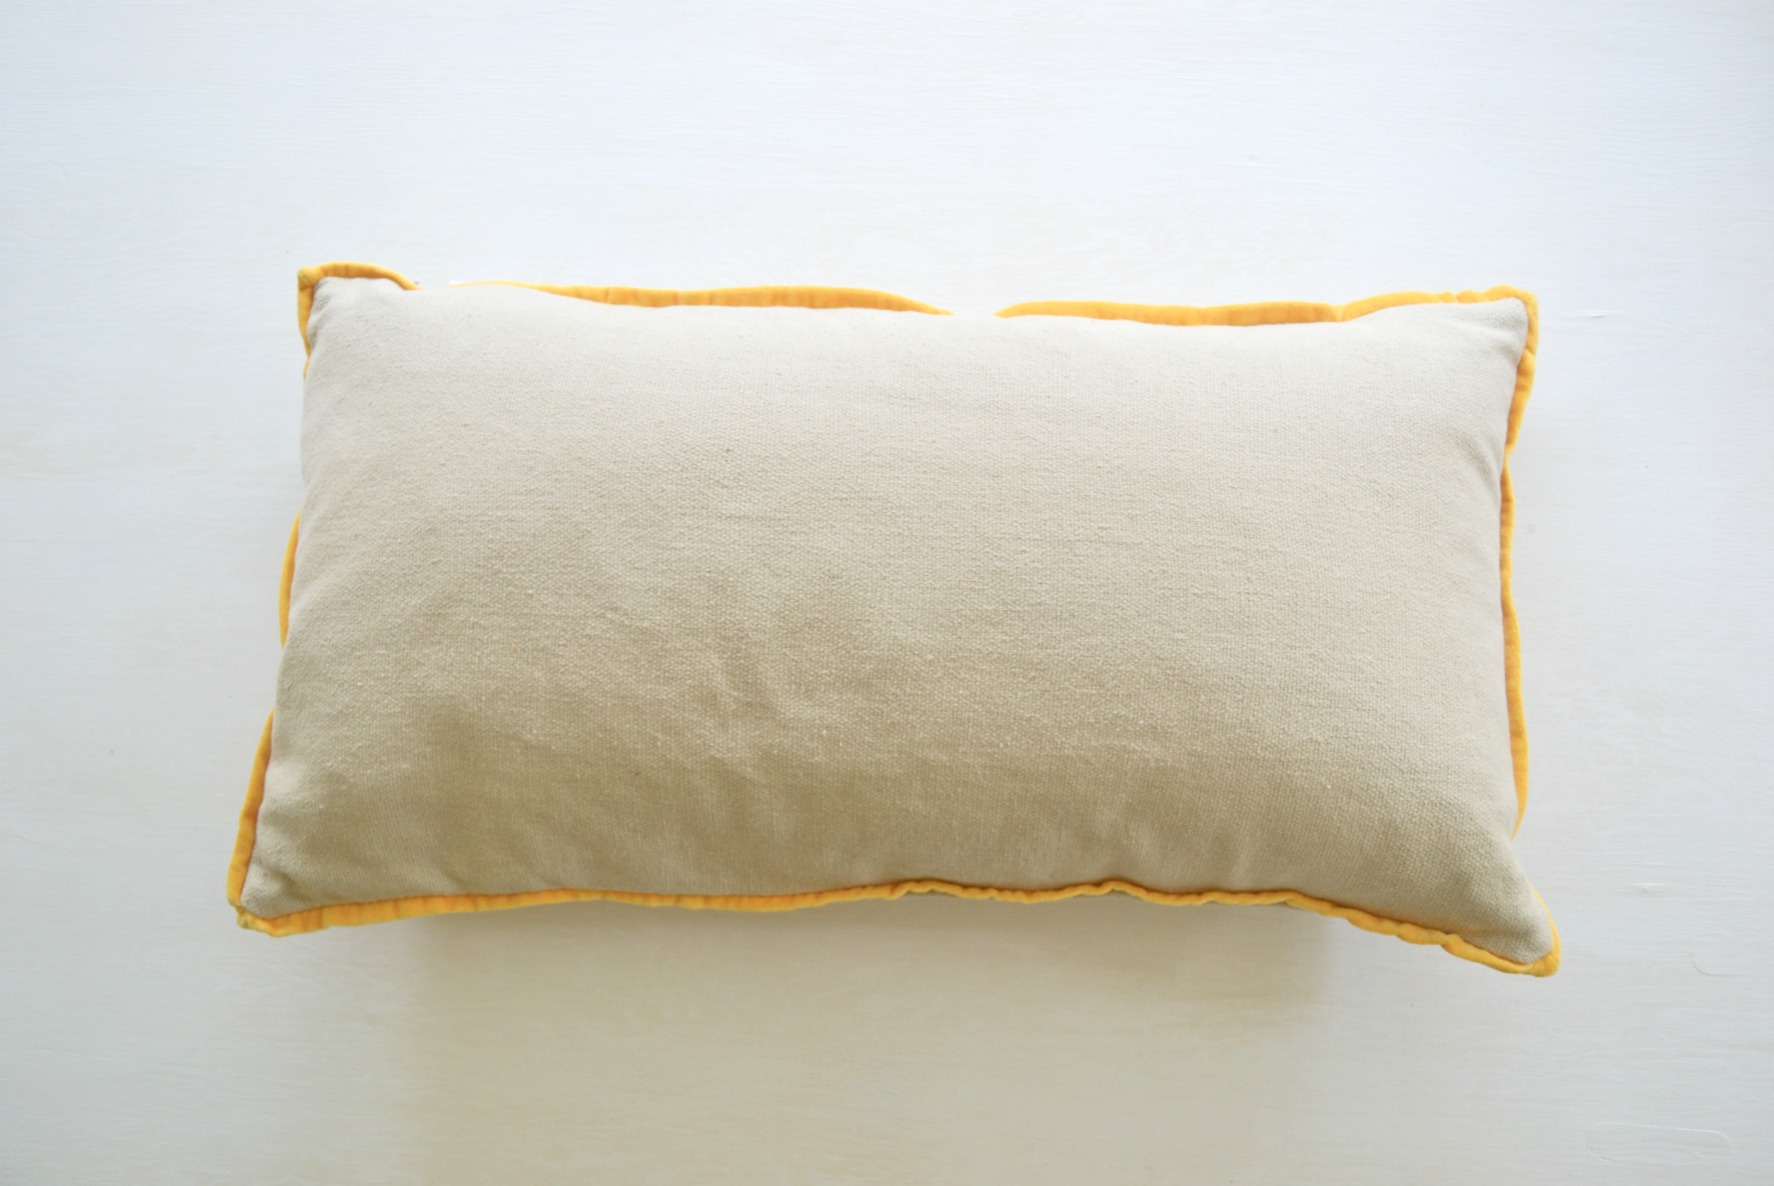
I’m a sucker for a keepsake anything. I have rubbermaids full of baby clothes. Boxes full of my kid’s artwork. I think I have about 10 Baby’s First Christmas ornaments. I only have 3 kids. Get my drift? Anyhoo, I’m still working on Jackson’s room makeover that I mentioned about 100 posts back. I kind of work on in bits and pieces. One bit will inspire a piece…and so forth. So, I spotted this yellow velvet trimmed pillow at Homegoods the other day. The neutral fabric was a perfect backdrop for what I had in mind.

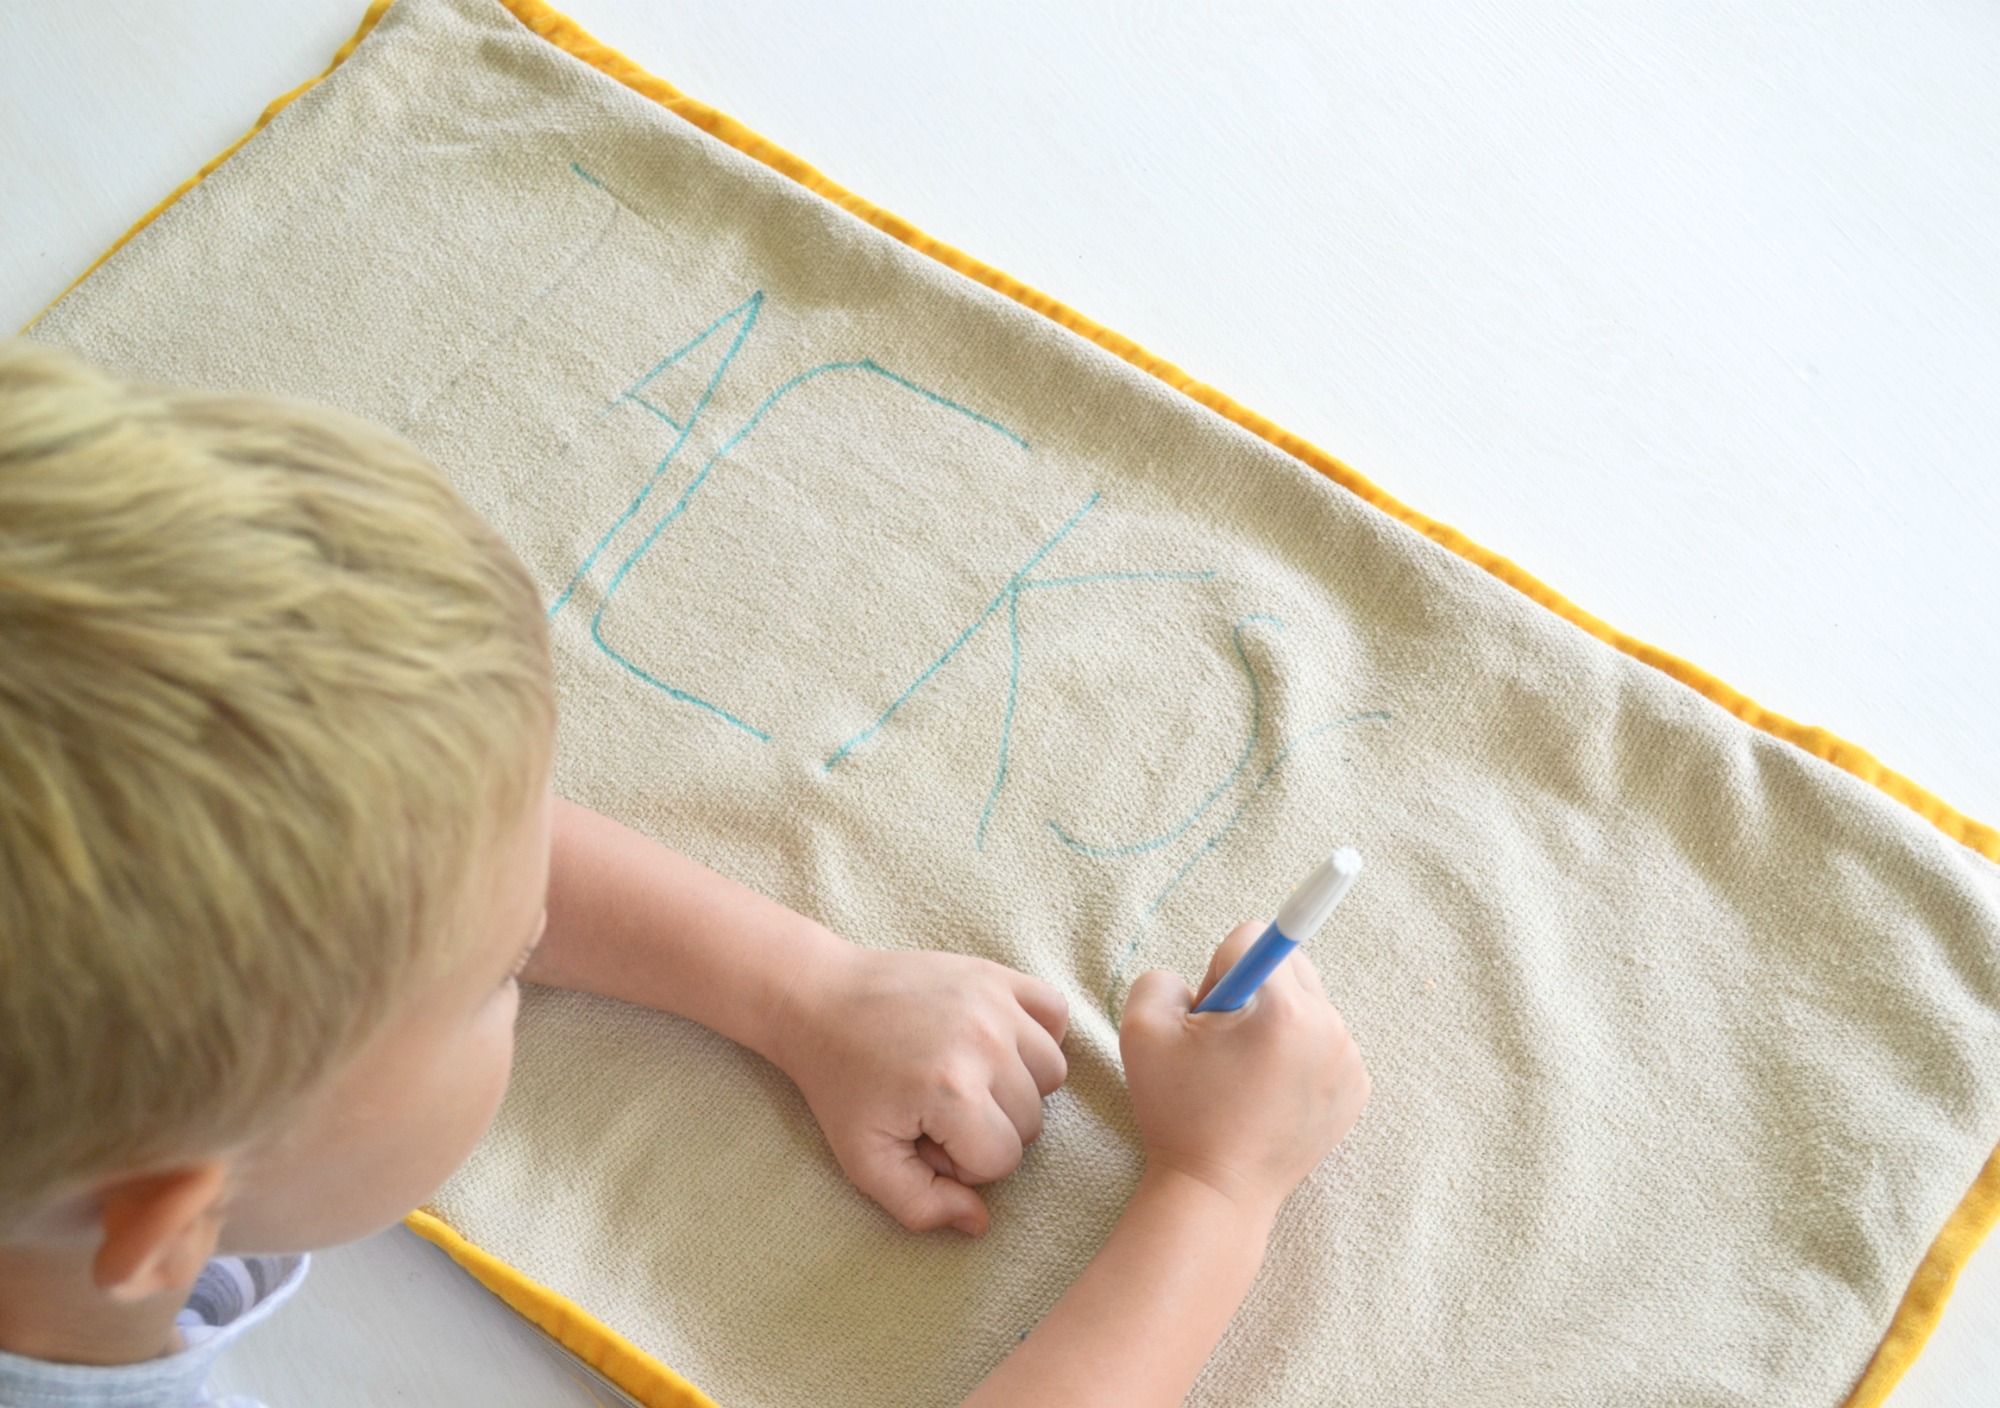
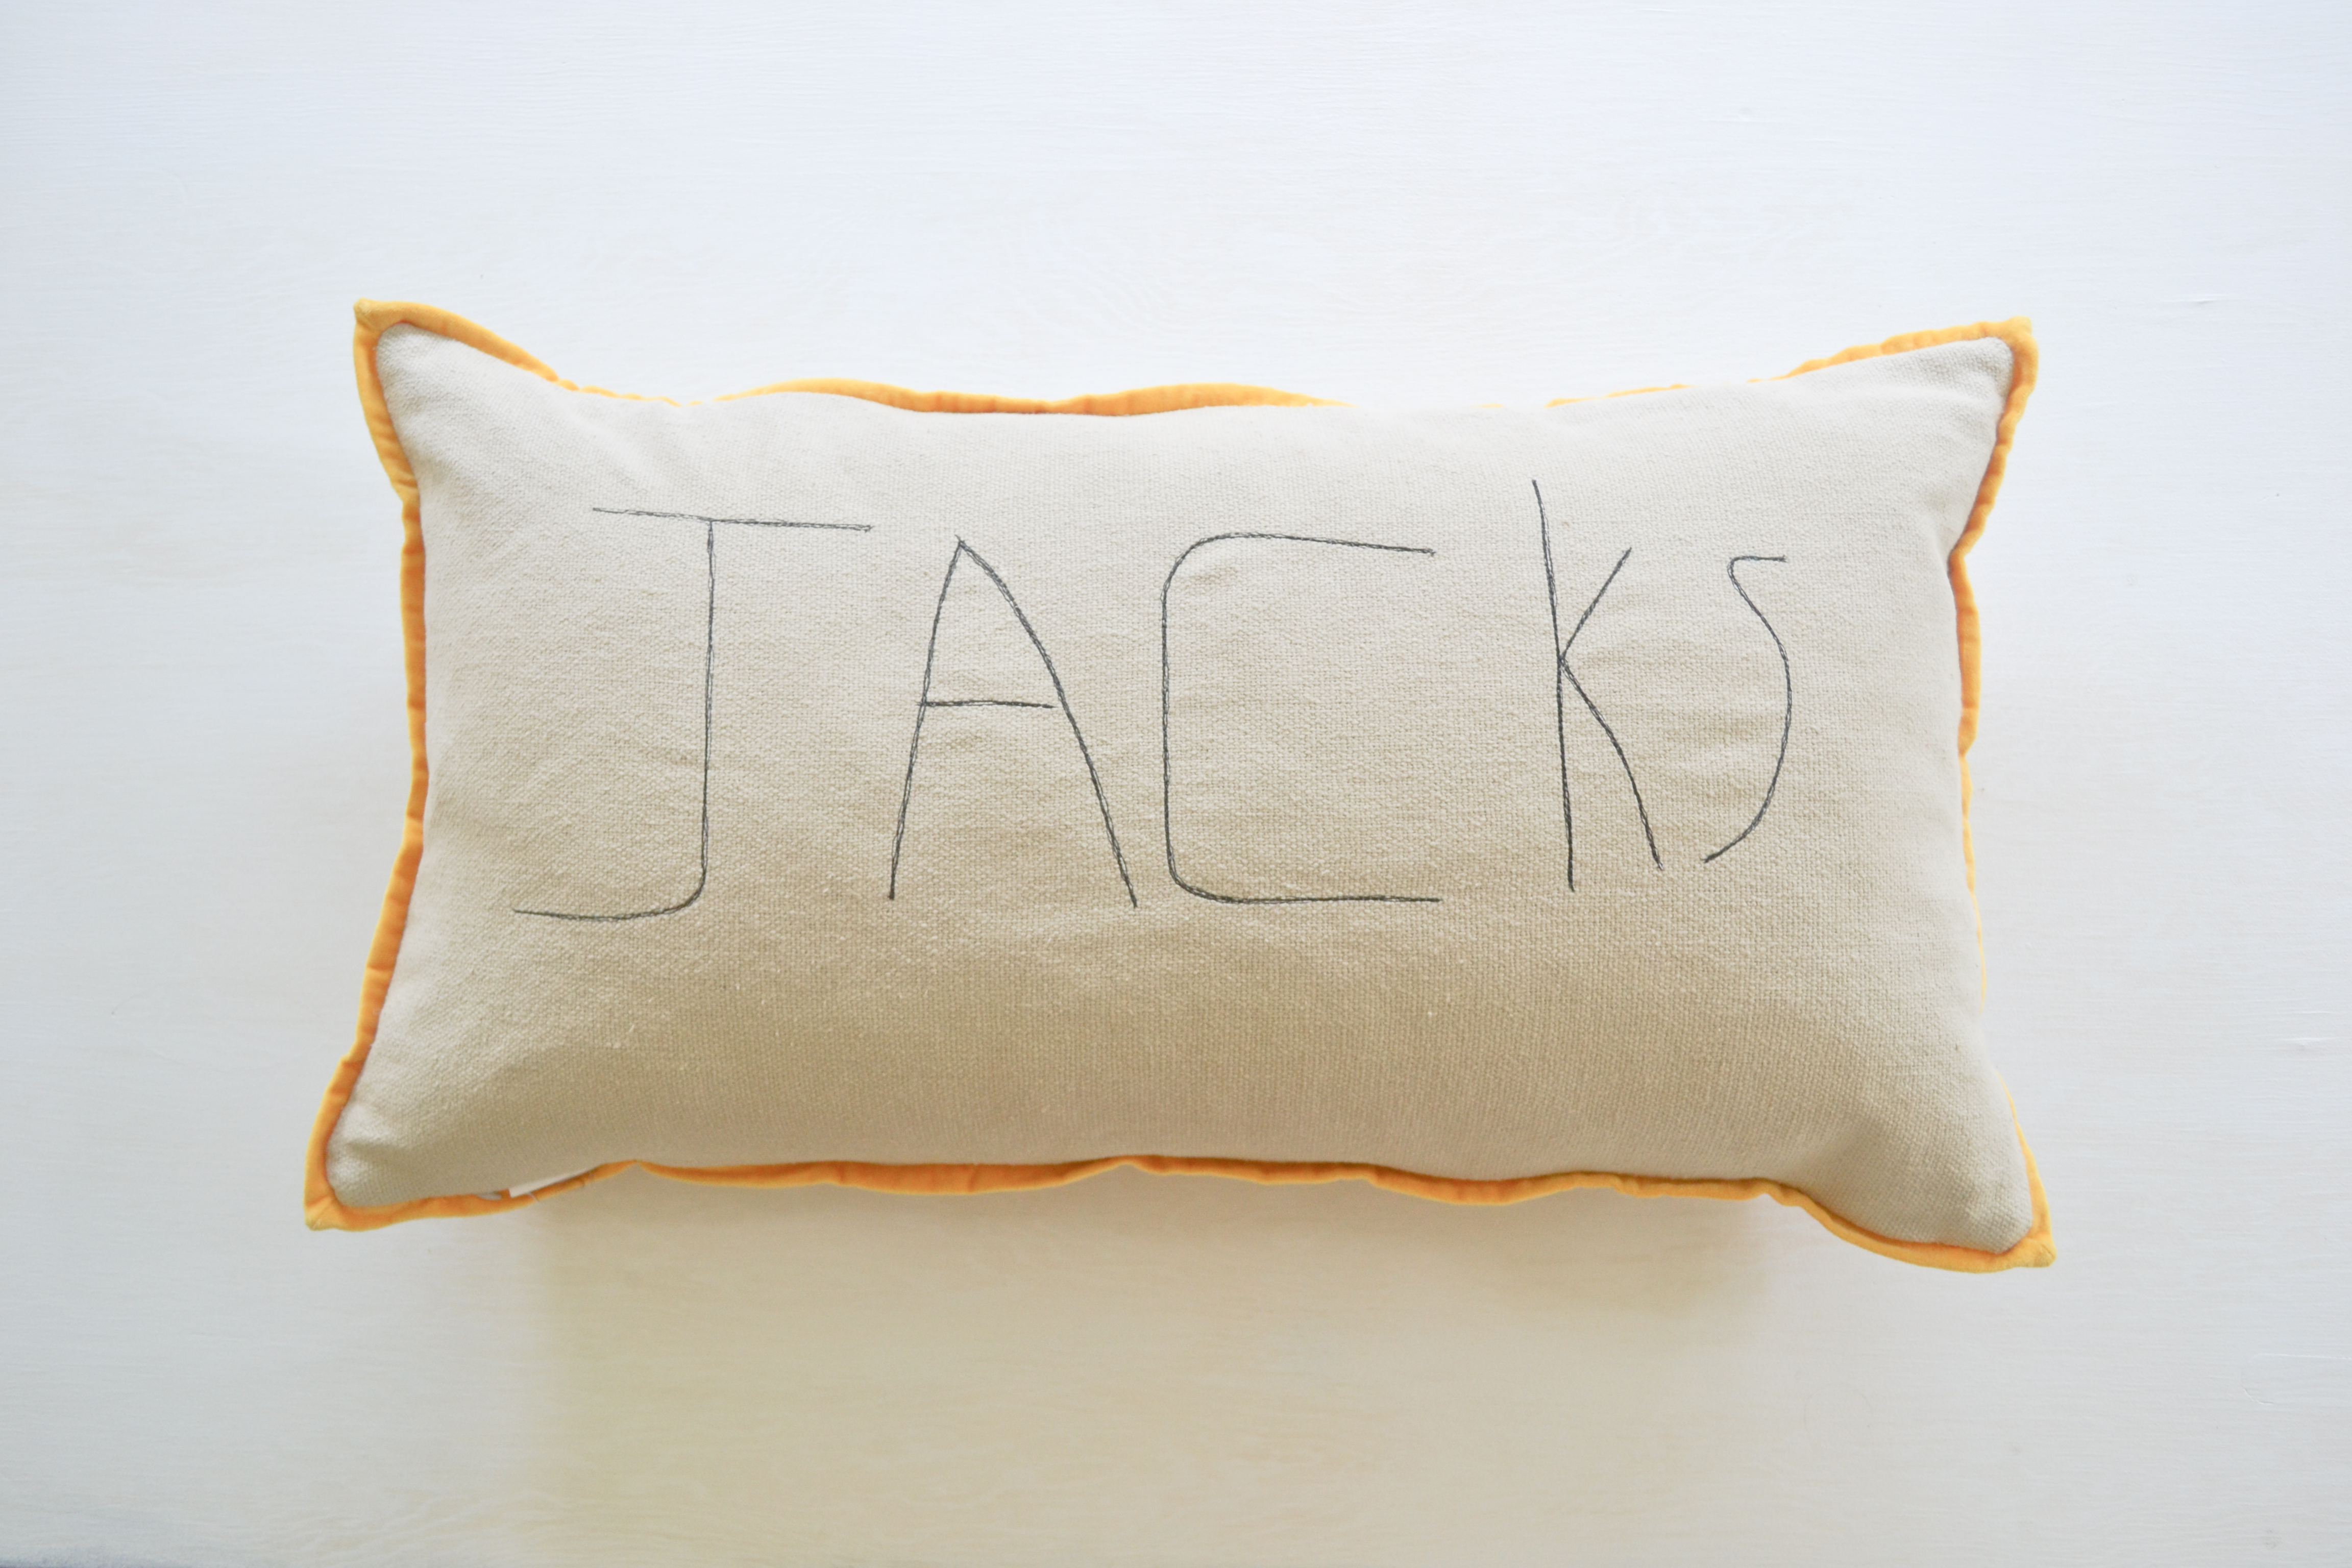
I love kid’s handwriting…it’s so charming and whimsical. I have oodles of things with Jackson’s name on it, specifially paper,  but I wanted a keepsake. I knew if I had him write his name on the pillow, I could easily stitch it out with my sewing machine.  And so I did!
how to sew name on pillow
name pillownamepillow4name pillow
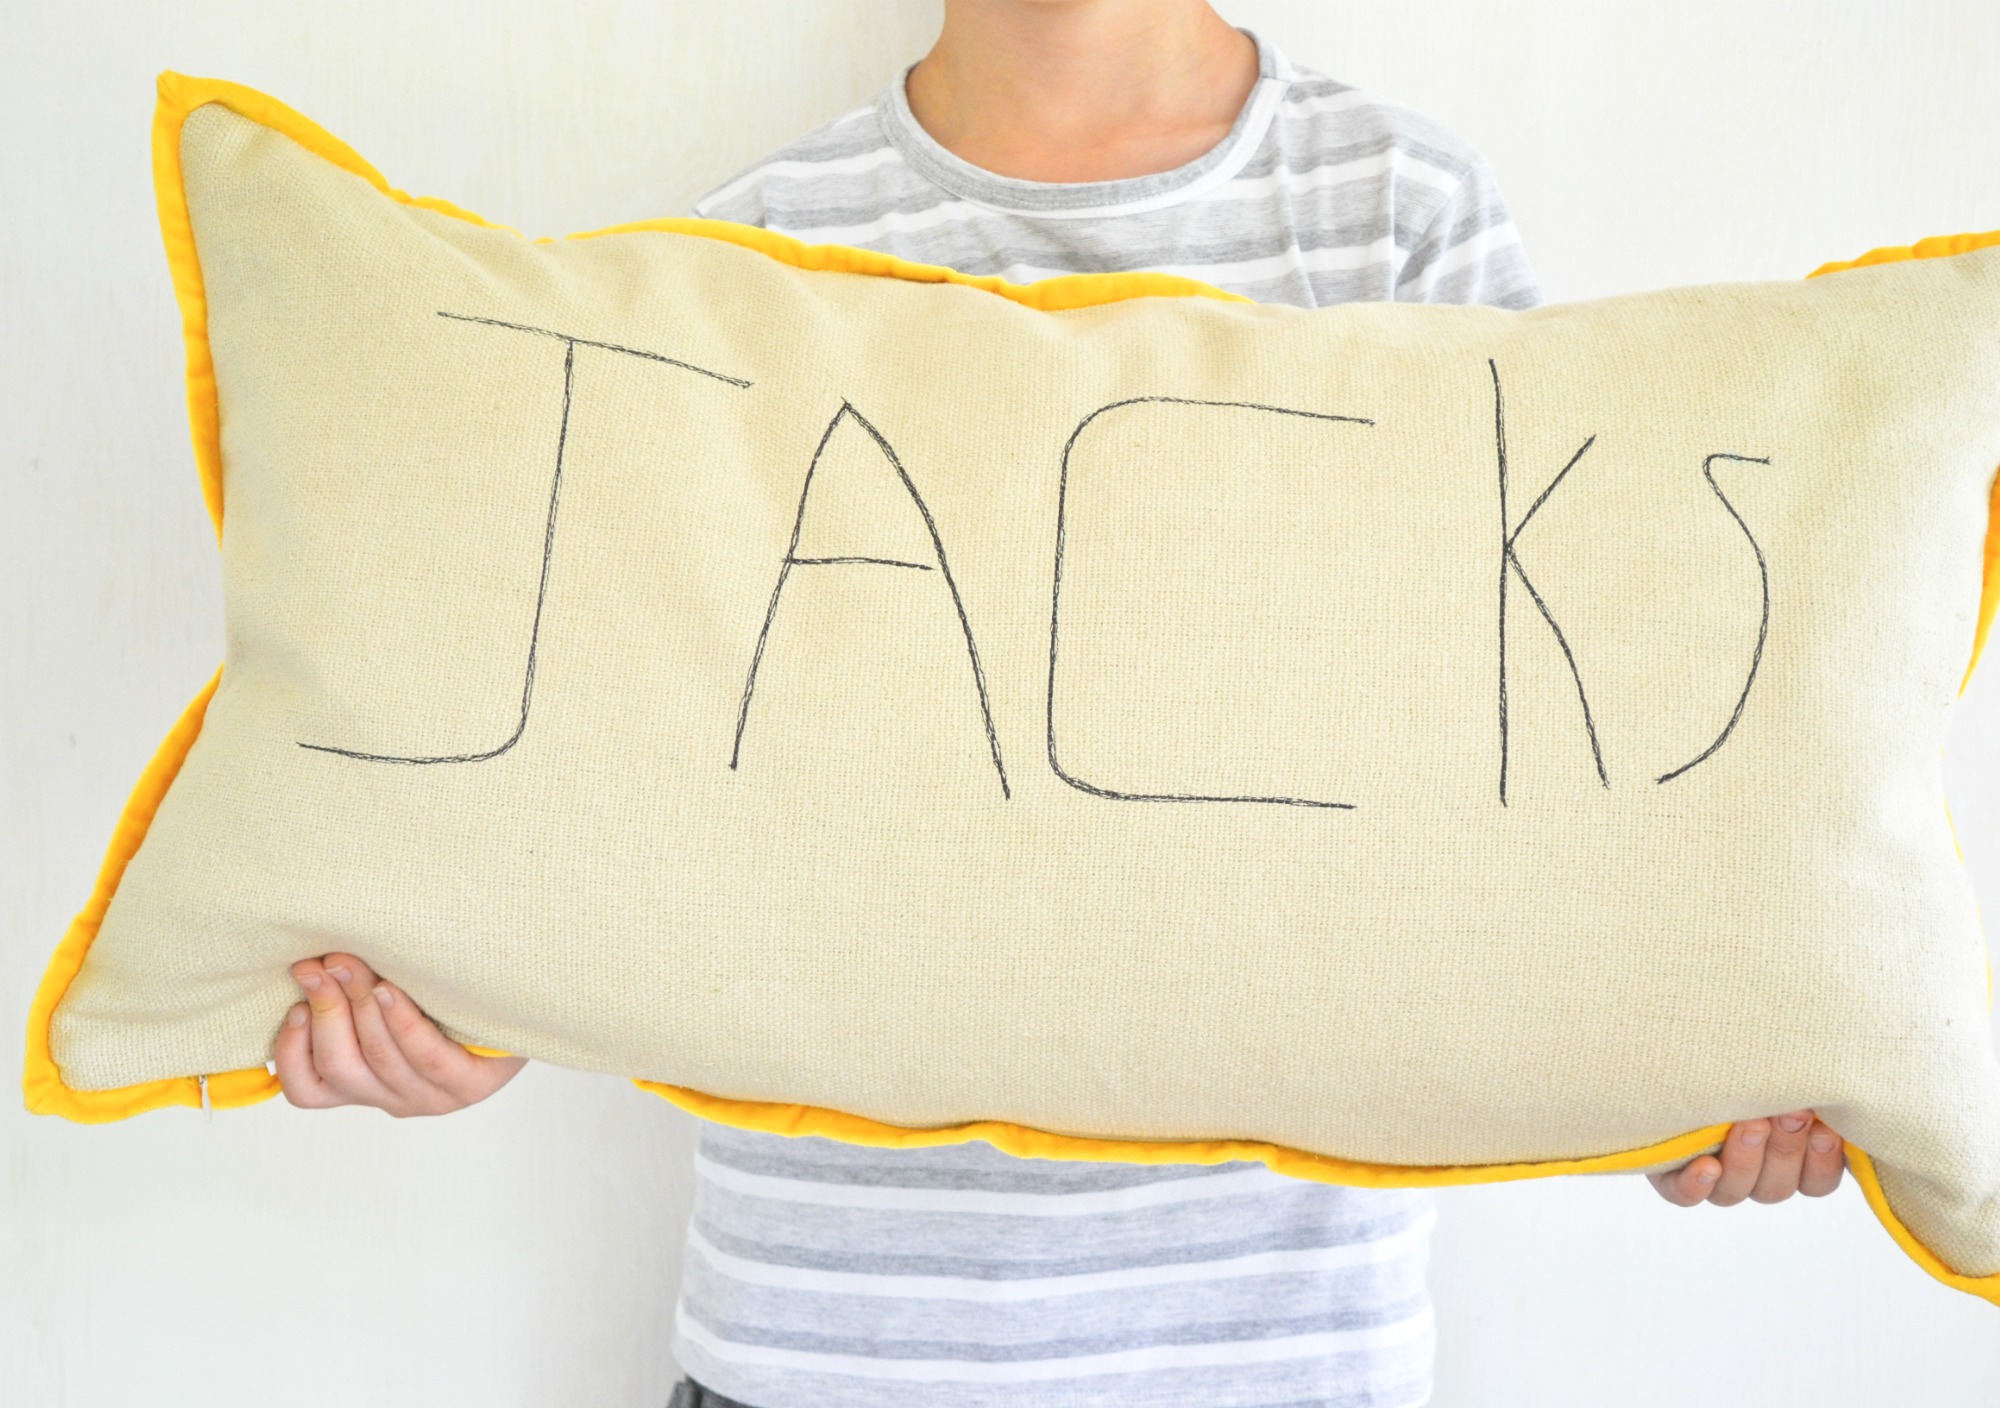
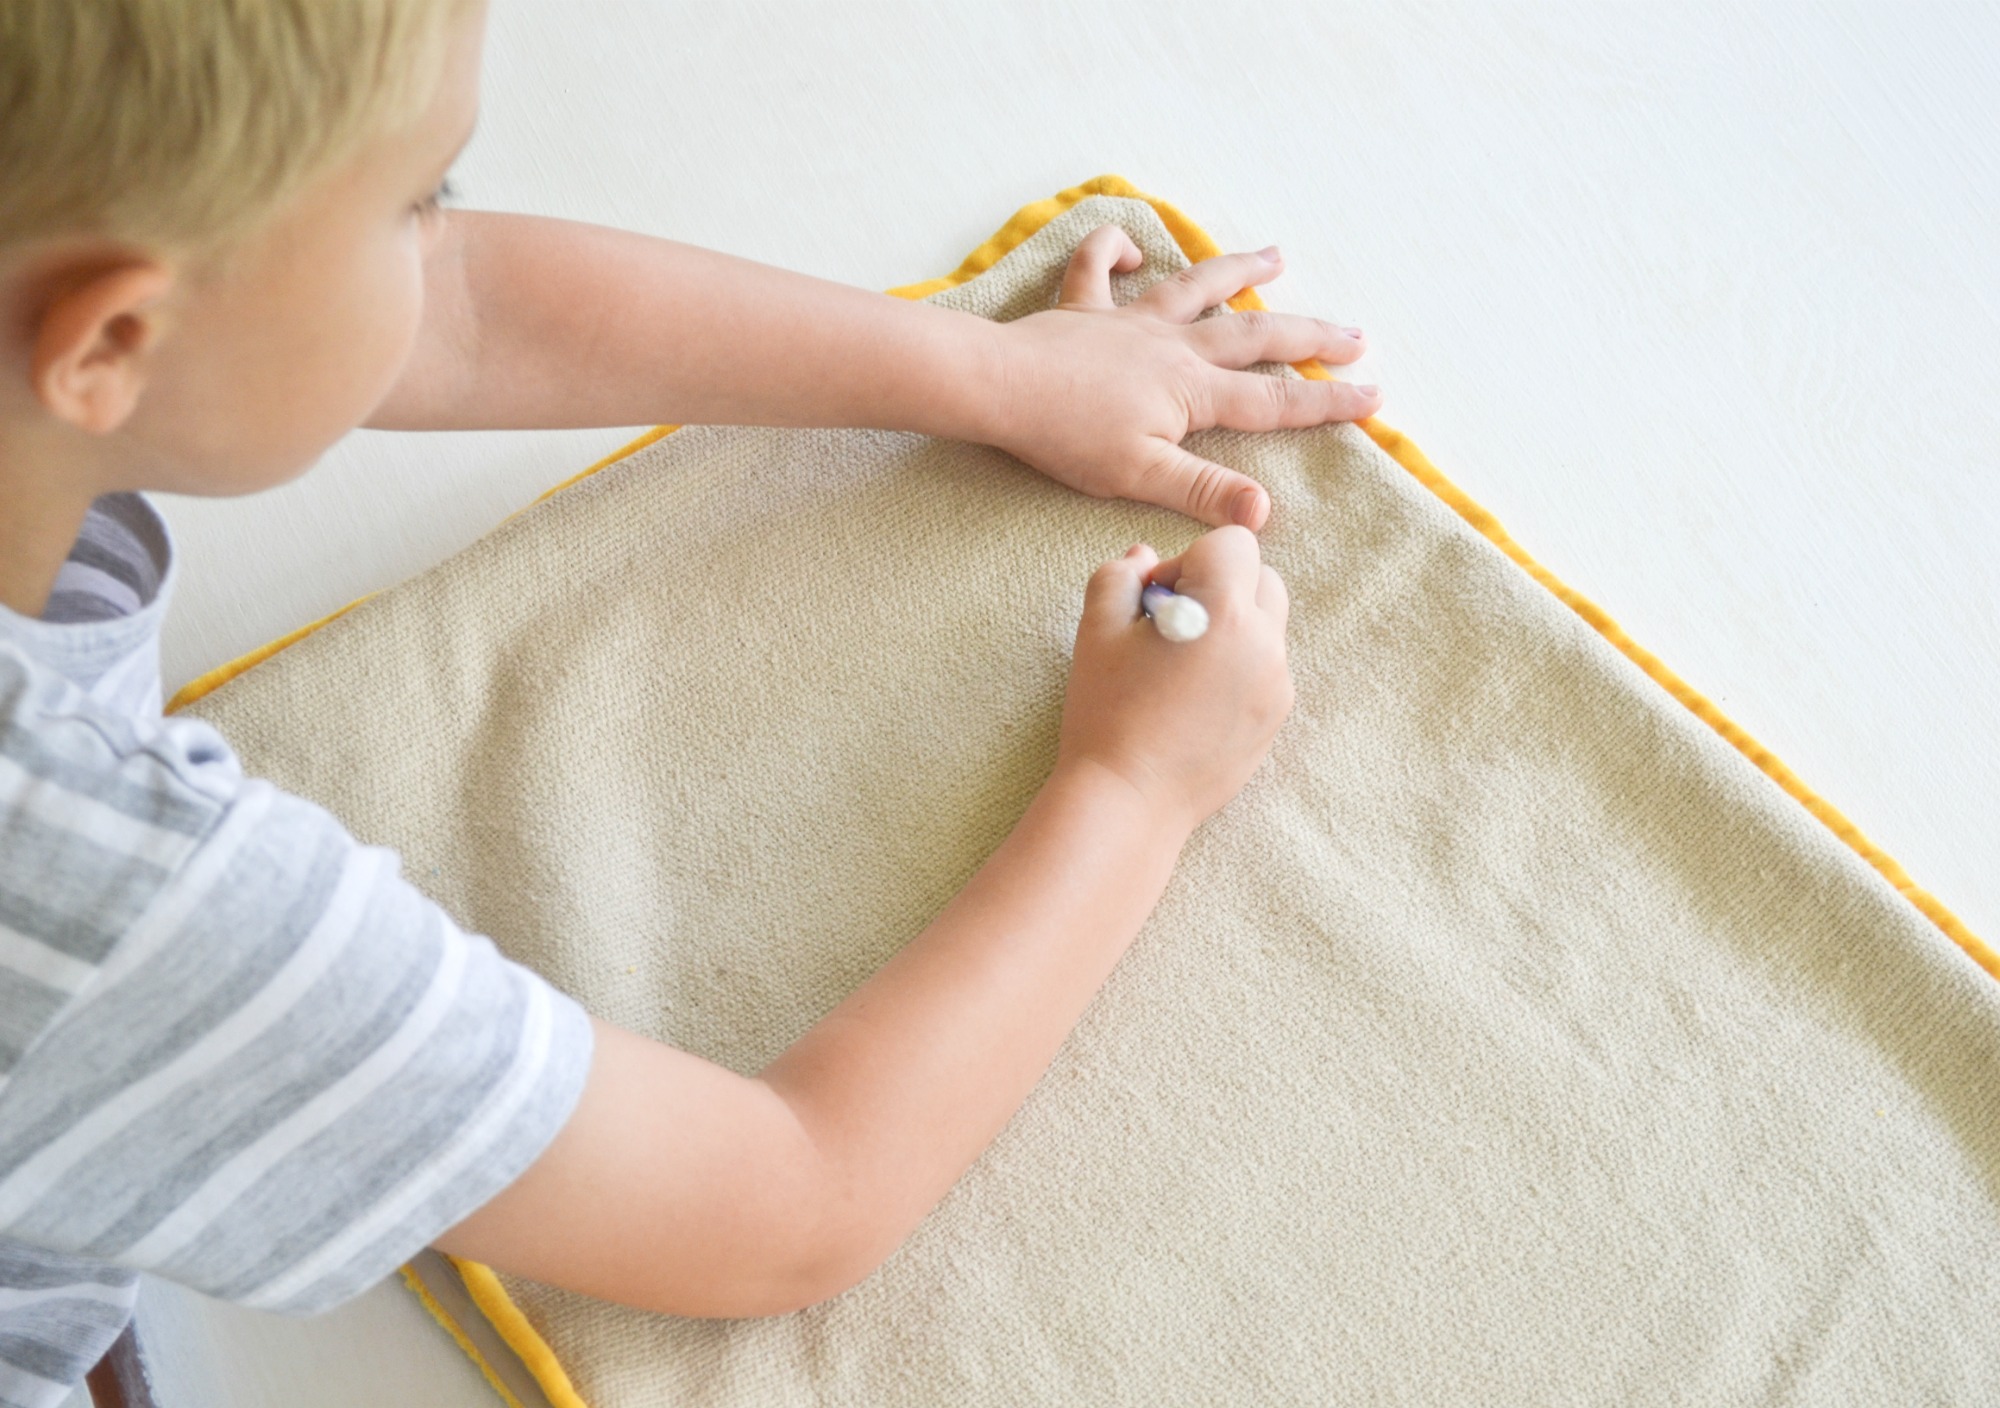
You might need to draw some two horizontal lines if they need help keeping their writing straight.
writing name on pillow
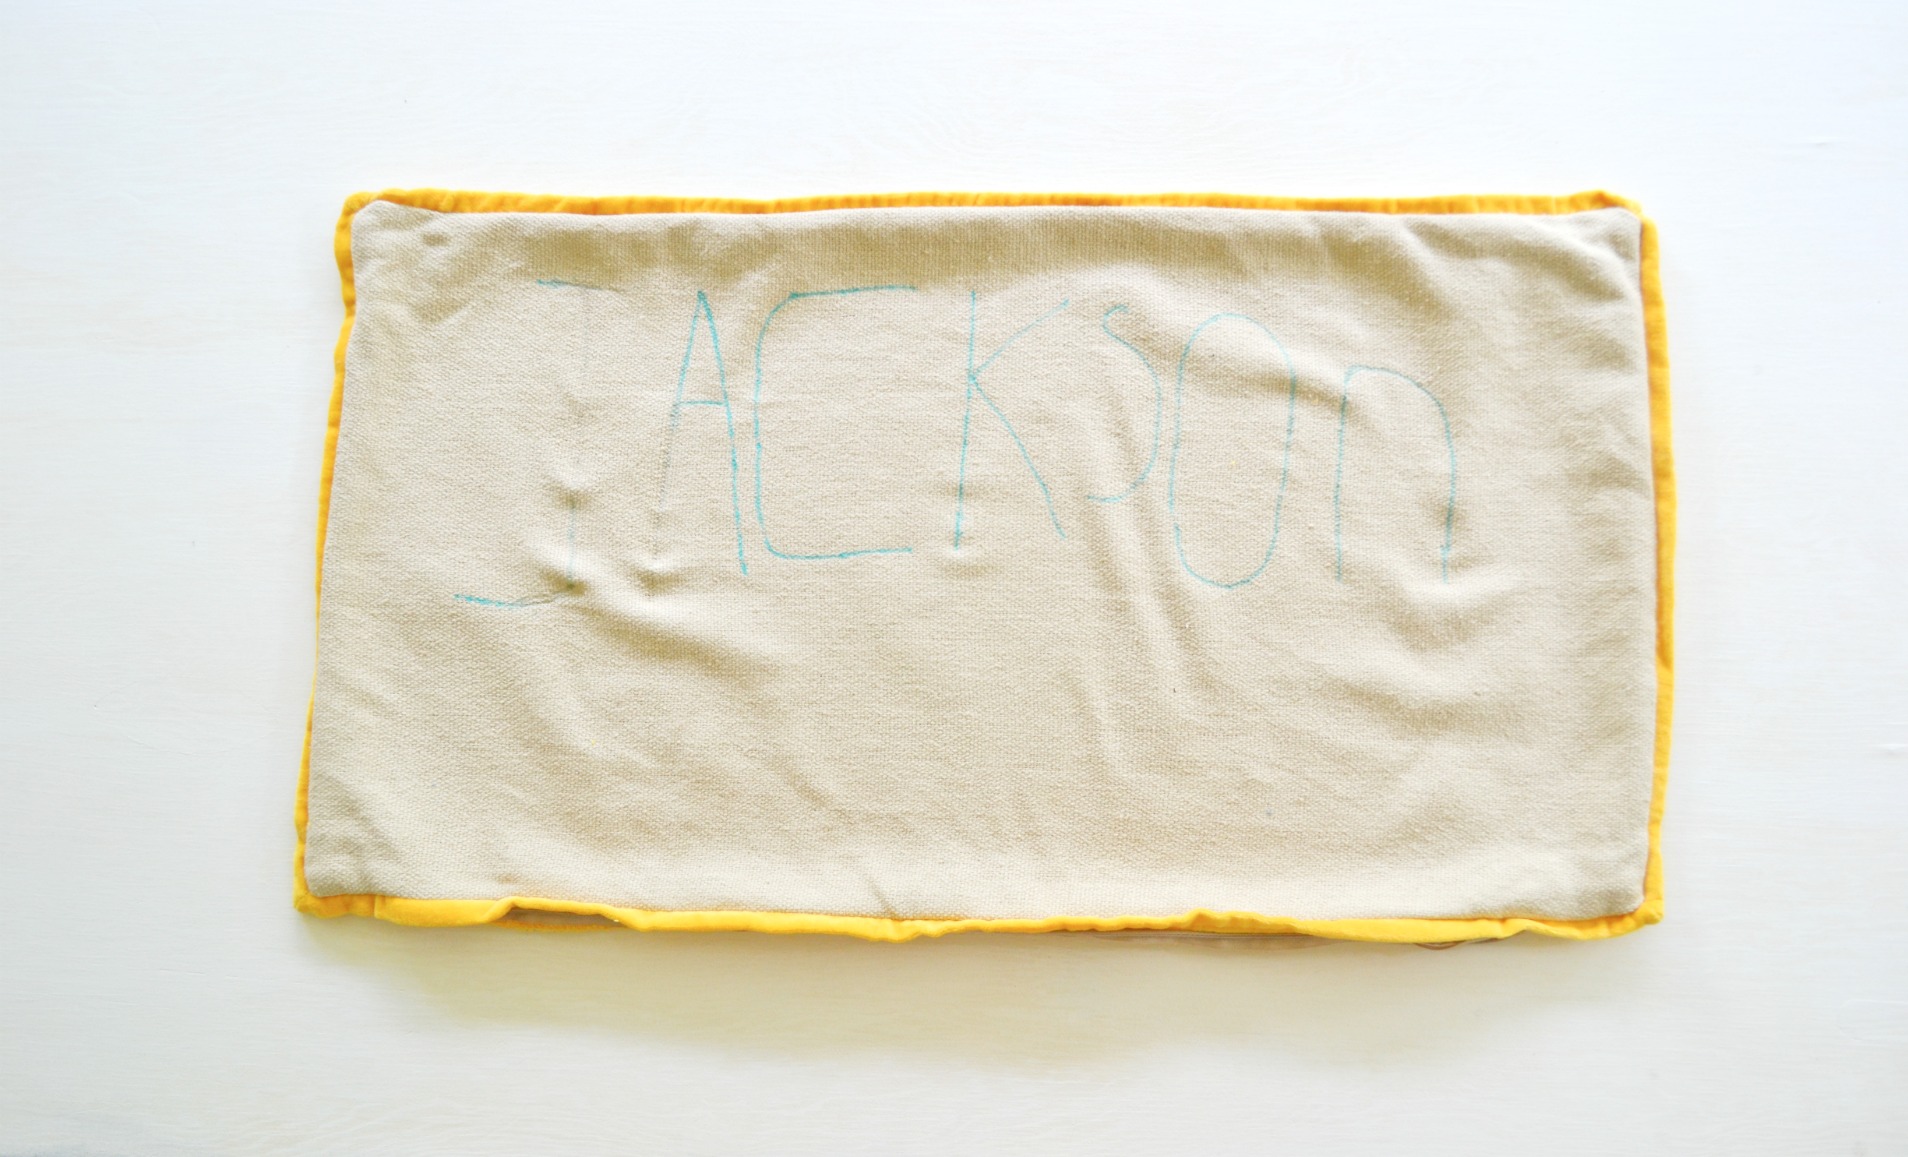
I used black thread and just went back and forth over each letter about 6-7 times, using his writing as my guide. When finished, spray some water and the ink disappears and you are left with just your child’s handwriting in stitches.
name pillowname pillow

Filed Under: MAKE Tagged With: diy, sewing

So You Think You’re Crafty…

September 17, 2013 by krisha

Well, I live to craft another week! I made it through the upcycle challenge…woo hoo! I was the designer behind the ruffled onesie made from old tshirts. I will have a tutorial for you later this week.ruffled tshirt onesieruffled onesie made from tshirt scrapsThis week’s challenge is live on the So You Think You’re Crafty blog. The theme is birthday! I do love a birthday!! If you could spare a minute and hop over to the blog, I’d love to have your vote! I can’t tell which one is mine, but I hope you like it enough to vote for it! Voting ends Thursday at 8pm EST.
so you think you're crafty

Filed Under: MAKE Tagged With: SYTYC

Cocktail Napkin Garland…

September 11, 2013 by krisha

For week 1 in the So You Think You’re Crafty challenge, I created this party garland out of cocktail napkins. The challenge theme was, In the Kitchen. Honestly, I wasn’t sure what I wanted to make. I didn’t really need anything for my kitchen, so I opted not to build. I thought about a recipe, but decided nah on that. What I ended up doing was, grabbing a bunch of cocktail napkins out of my kitchen cabinet and turning them into this cool party garland!
cheap and easy party garlandThings you’ll need:
Cocktail napkins in various patterns and colors.
Sewing machine or needle and thread.
napkin party garlandIf you are using a sewing machine, adjust your stitch length and tension settings. If you have a gathering foot, attach it now. Place your first napkin under the foot, with the open side facing towards you. Start gathering the napkin and insert your next one inside the previous napkin…a few stitches before the start of the new one. That sounds like a mouthful, but say it a few times and you’ll get what I’m saying. Now, if you don’t have a sewing machine you can gather the old fashioned way with a needle and thread. Of course it will take longer, but definitely still doable. If you did this by hand, don’t worry about the previous step I just mentioned. Simply, do a series of needle up, needle down through the napkin in order to make a gather.
party garland out of napkinsKeep sewing to your desired length or until you have a string of goodness like this…
quick and easy party garlandeasy party garland made out of napkinsquick and easy party garlandquick and easy party garlandHang up and marvel at your cocktail napkin masterpiece! And if a guest asks for a napkin, you can just be all like, Duh.

Filed Under: MAKE Tagged With: diy, party

Paper Cone Garland…

September 4, 2013 by krisha

I have been working on this post for nearly 2 weeks. Finally, today I was able to finish up my photo shoot and put together this tutorial.

I’m kind of obsessed with garlands these days. Lately, I’ve been challenging myself  to use items I already have around the house. Yes, I’m dipping into my craft hoard and actually using some of my supplies.
cheap easy garland

I absolutely love how this garland came together! Isn’t it fun? And look at bull…party animal!

Supplies you’ll need:

  • Paintbrushes
  • Liquid Watercolors or regular watercolors
  • Circle punch
  • White cardstock
  • String or twine
  • Large eye needle
  • Scissors
  • Scrapbooking double sided tape

Instructions:

  • Punch out several circles from your white cardstock.
  • Cut a slit from outer edge to middle of circle.
  • Apply double sided tape to one side of the slit
  • Form circle into a small cone and secure with tape.
  • Paint around the perimeter of the cones.
  • Thread painted cones, alternating them up and down.
  • Hang and enjoy your masterpiece!watercolor garlandcheap easy garland for partieseasy garland for birthdaycheap easy party decorationscheap party decorparty decorations on a budget
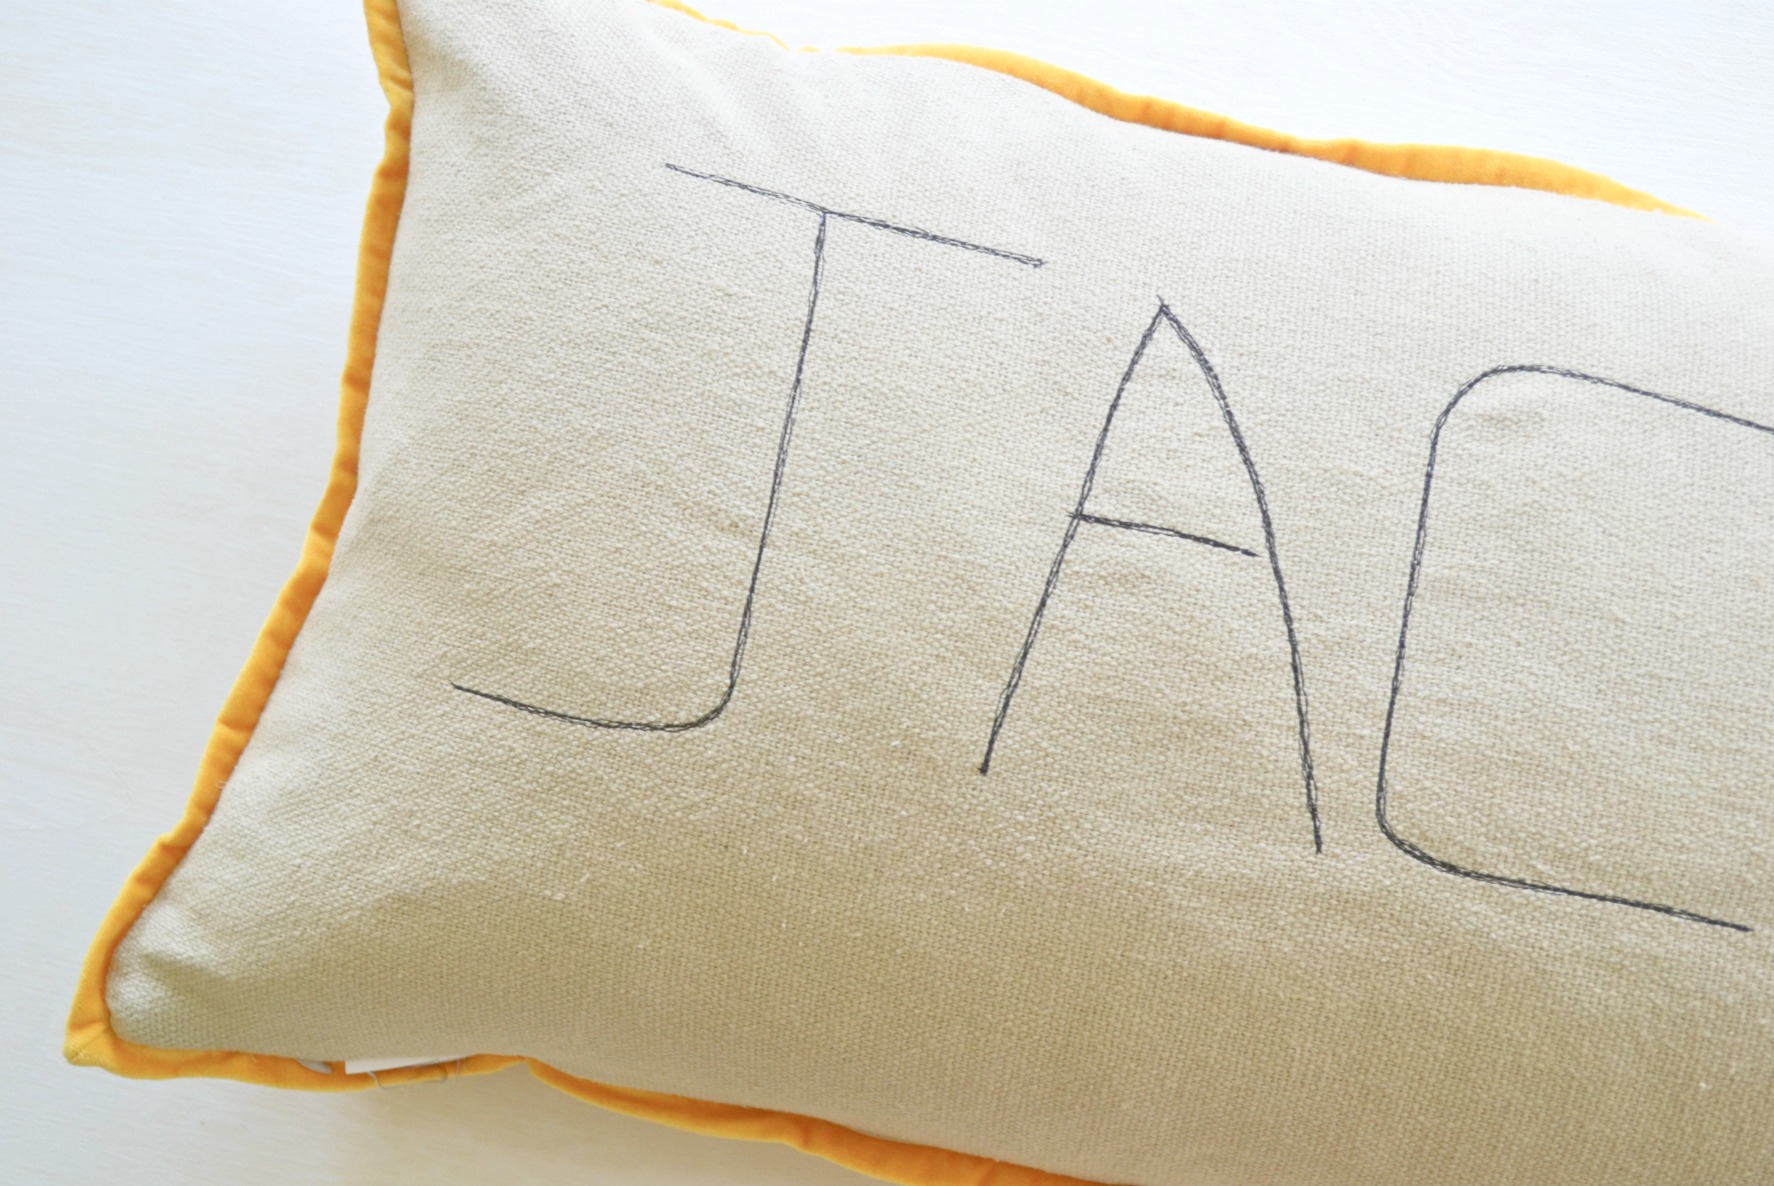
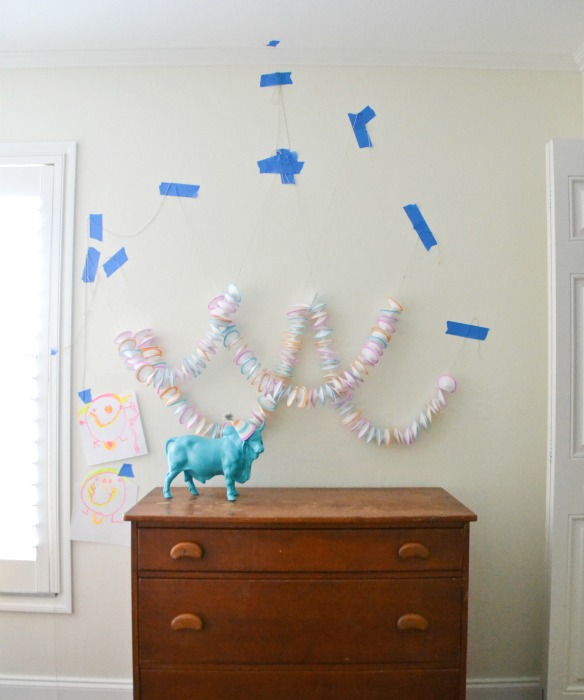
Here’s a pull back shot of my set up. A certain little girl kept photobombing my shoot with her “well endowed” drawings. cheap party decor

Filed Under: MAKE Tagged With: diy, party

Baking Cup Party Lights…

August 21, 2013 by krisha

Like many of my ideas, this one has been swimming around in my head for quite a while.  I don’t know what has taken me so long to do up this post, because the whole idea is super easy! It literally took me 5 minutes to do. You know those really cute baking cups?  I had some mismatched ones just sitting in my cabinet. There were too few to use for a party, so I embellished a string of indoor lights and created this fun party accessory!baking cup string lights

camping lights

What you’ll need:

  • Baking cups
  • Indoor mini string lights
  • Awl or other pointy object of similar diameter.

baking cup party lights for camping

Instructions:

Using the awl, poke a hole in the center of all the baking cups.
Do not make the hole too big, or the baking cup will fall off.
Insert lights into baking cups.
Plug in and party on!

baking cup string lights

Obviously, these are a little off center, but they still got the job done.

cupcake liner party lights

camping party lights

baking cup string lights

cupcake liner string lights

I love these for a patio party or how fun would these be to take on a camping trip?

Filed Under: MAKE Tagged With: diy, party

God’s Eye Cake Topper…

August 16, 2013 by krisha

When I was pulling ideas for Jackson’s living room camp out party, I scoured Pinterest for cake inspiration. Almost every camp out party had the same campfire cake. It was really cute, but I wanted something different. Then I remembered these God’s eyes I used to make when I was kid. Do you remember making these? I made mine at Vacation Bible School, but I know others that made them at camp. The story goes that the four points represent earth, fire, water, and air. Traditionally, they are created to mark a celebration or a blessing.  I think that’s a perfect fit for camp out birthday cake!

god's eye cake topper

If you’ve never made a God’s eye, watch this tutorial. It’s been a while since I made one and this helped as a refresher. It’s a just a series of over and under weaving. You can get as intricate as you like, but I kept it simple.

god's eye cake topper

You will need:

  • Variegated yarn
  • Bamboo skewers
  • Scissors

God's Eye Cake Topper 

Instructions:

  • Watch the video tutorial.
  • Cut skewers to desired lengths. Leave one short, one long.
  • Tie the two skewers together and knot.
  • Begin weaving over and under.
  • When finished, wrap yarn around your stopping point about 4-5 times.
  • Thread tail of yarn through one of the wraps you just made.
  • Secure with a knot and trim excess yarn.

Filed Under: MAKE Tagged With: diy, party

Mini Pencil Piñatas…

August 8, 2013 by krisha

It’s back to school time and you know what that means? Mini pencil piñatas of course! I am just obsessed with piñata making. I especially love making mini piñatas. There is something so fun about giving someone a piñata! Maybe it’s the unexpectedness? Like…Hi!…Oh and here’s a piñata for you! Or the surprise of what’s inside? I don’t know…but you should definitely try it at least once. Now that I feel like I’ve mastered my technique, I have plans for many more! The mini-er the better!  

pencil pinata

You will need:

  • Cardboard tubes (I used paper towel tubes, cut in half)
  • Tissue or crepe paper in pencil colors
  • Glue stick
  • Scissors
  • Black Sharpie
  • White cardstock
  • Masking tape
  • Treats for stuffing

how to make a pencil pinata

Instructions:

  • Cut tissue paper in strips and make fringe (see here or here for folding and cutting tutorial).
  • Draw and cut a circle out larger than the cardboard tube.
  • Fold circle in half, then in half again.
  • Unfold. Then using fold marks as a guide, cut out 1 piece of the circle.
  • Fold into a cone shape and secure with masking tape.
  • Cut tabs around the bottom of the cone, about 1/8 in apart (this helps to manipulate the cone to fit on cardboard tube).
  • Attach cone to cardboard tube with masking tape.
  • Add glue to the bottom of the cone and begin wrapping the tissue paper. Make sure the fringe is pointing down.
  • Continue adding glue and tissue paper, changing colors when needed until finished.
  • Stuff with small school supplies or candy. I added Hershey’s Hugs & Kisses with a little note.
  • Glue 2 squares of the eraser color tissue paper on the end to seal the piñata.
  • Trim into a circle, leaving 1/8 inch overlap.
  • Glue and fold down overlap.
  • Add a final piece of eraser color fringe to cover the overlap.

pencil pinata

 pencil pinata

pencil pinata

 pencil pinata

 pencil pinata tutorial

To “bust” the piñata, just punch through the top of the eraser with your finger!

back to school treats

pencil pinata

pencil pinata

These are going to make sweet, little back to school treats!


Filed Under: MAKE, Tutorials Tagged With: party, piñata, tutorials

Leaf Garland…

August 4, 2013 by krisha

So, I’ve been missing from the scene for a couple of weeks. I went on a much needed vacay with the fam to the Smoky Mountains! It was fantastic…I’ll write more about that later. For now, I wanted to share this leaf garland I whipped up today.

leaf garland

Do you remember the woodland fairy wings I made last year for Halloween? Well, it seems I had a surplus of the leaves, because maybe, just maybe I hoarded them all from the Dollar Tree. Stop judging me!! Seriously though, I love these leaves. They come 10 to a pack and are made of crepe paper and wire. If you buy anything from the Dollar Tree, buy these leaves! Who cares if you have no reason for them now, except to make this cool leaf garland? Hoard them, hoard them all!

For the woodland fairy wings, I painted them with a mottled paint technique. I opted out on doing that this time and just phoned it in. I actually plan on using this for Jackson’s living room campout birthday, then it will be recycled into fall decor. So, straight up Dollar Tree leaves will do just fine.

dollar tree leaves

dollar tree leaves

paper leaf garland tutorial

You’ll need:

  • Dollar Tree leaves
  • Twine
  • Scissors
  • Large needle

Instructions:

  • Using your scissors, remove all the stems.
  • Carefully bunch up and shape leaves individually. These are made of paper and will rip if you’re not careful.
  • Cut desired length of twine (allow for extra on both ends for hanging) and thread through needle.
  • With 3-4 leaves at a time, insert needle into center of leaf and pull twine through.
  • Repeat until finished.

leaf garland

This is going to be great for the living room campout, but for now, nothing says fall like a tiffany blue bull, a jar of rocks, and a paper leaf garland!

Filed Under: MAKE

Fourth of July Cake…

June 19, 2013 by krisha

This year for the fourth, I’m breaking with tradition {no more cool whip and berry flag cake for me} and serving this for dessert. If you can bake, then you can make this Fourth of July cake. I know you might be thinking…Whaaa? I can’t carve a United States out of cake! But you can..honestly you can!4th of july cake

…

Read More

Filed Under: MAKE Tagged With: diy, Fourth of July, tutorials

Tie Piñata…

June 9, 2013 by krisha

The last time I made a piñata, it was on a much smaller scale. Remember these? Let me just say this, I have a whole new found respect for piñata makers. Ok, so I’ve never given piñata makers much thought, but I do now.  Obviously, I want you to try my project, but I feel it necessary to warn you…it can be tedious. This isn’t even full blown paper maché piñata makin’. But, if you’re nitpicky…probably not the best project for you. I am confirmed nitpicky…but, I can also exhibit restraint when crepe paper goes awry. Not really, I’m just a super competitive person and I was not about to let some wrinkly paper take me down. Proceed with caution.

tie pinata…

Read More

Filed Under: MAKE, Tutorials Tagged With: diy, piñata, project, tutorial

« Previous Page
Next Page »

Primary Sidebar

Lets Connect!

  • Facebook
  • Instagram

Instagram

A boy and his chicken. A boy and his goat. ❤️ A boy and his chicken. A boy and his goat. ❤️ Oh yeah, we have a baby goat. We named him Walter. I wasn’t really looking for a goat just yet, but a sweet Momma was emotionally overwhelmed and was asking for help.  Walter had a difficult birth so he was unable to nurse and won’t yet take a bottle, so he is syringe fed every four hours.  Sitting with Walter, feeding him at 4 am.. I was reminded of all the baby feedings and I thought I don’t miss this at all. 😂 But he sure is cute!
We let Miss Maggie out to forage. She was living h We let Miss Maggie out to forage. She was living her best life scratching up all the worms. Too bad her peck isn’t strong enough to bust open all those sprouted coconuts. Whatever you’ve seen on tv, it’s not easy breaking into a coconut, promise.
Chasing caterpillars in trees and raising chickens Chasing caterpillars in trees and raising chickens is the childhood I dreamed  they would have for so long.  Just so grateful to God for giving me my heart’s desire, even though I did nothing ever to deserve it. ❤️
If there is an injured animal in need of help, you If there is an injured animal in need of help, you can bet it’s waiting on my kids to find it. This happens all the time. So it really came as no surprise upon arriving at the park the other day that Annie would instantly find a Mockingbird sitting on the ground unable to move. 

Annie: Mom, we have to help it.
Me: Of course, but we were supposed to go for ice cream after the park.
Annie: I would rather help the bird. 

After looking at the little guy, I could tell he likely wouldn’t make it. He died en route. Sterling Lance she named him as she does all her rescues, didn’t die alone under the tree. A few weeks ago it was Gloria, an injured dove I woke up to find in my garage in a makeshift habitat. And many more before her!

We returned Sterling Lance to the park and went for ice cream. Every kind of kid flavor available from cotton candy to birthday cake and this child, old soul and all,  requests, “One butter pecan cone, please.” I just could not love her more. ❤️
Last week we celebrated my first born turning 13. Last week we celebrated my first born turning 13. Bittersweet, of course, but aren’t they all? I was not prepared for the many changes in a young boy from 12 to 13. Especially the voice. I didn’t even see it coming. Oh how I miss his high pitched little boy voice. Just looking at pictures from his 12th birthday and comparing them to this one, the baby look has faded away and the beginnings of a young man are taking hold.  At 13 he stands nearly 5’8 and is my reacher for all the things. He is a good kid and a simple soul. For his birthday all he asked was for offshore fishing, a chocolate chip cookie cake, and a sushi dinner.  He got his first cell phone (no internet or social media), good books, art supplies, and handmade gifts and cards from his siblings. Happy 13th Birthday, Jacks! You were and always will be my best first baby. ❤️
What he lacks in chill, he more than makes up for What he lacks in chill, he more than makes up for in helping. He always wants to help with all the things. Though I could mostly get things done quicker on my own, it wouldn’t be nearly as good. ❤️
Happy Independence Day, America! We spent the day Happy Independence Day, America! We spent the day working on our property and catching snakes. I am blessed beyond measure to live in the land of the free, when so many are not. I am free to worship and praise God. Free to have babies. Free to homeschool them. Free to own land. Free to travel. Free to vote. There are people in this world who would give their life and risk it all for what I have. My freedom is not lost on me. ❤️
A little behind on posting. Savannah and Wyatt pai A little behind on posting. Savannah and Wyatt paintings from last month.
Far and away my most humbling child. I love you al Far and away my most humbling child. I love you all numbers! Happy 5th birthday (last Friday), my darling boy. ❤️
Lately, I’ve found myself reaching for my big ca Lately, I’ve found myself reaching for my big camera longing to record more of our story. It’s been put away for what seems like at least 2 years. I used to document days like this on my blog frequently, but much like my children, the seasons of life require different care. I can see the season changing again and it feels good to be in this familiar space of creating with these great loves of my life.
Have you started your book tablecloth yet? I start Have you started your book tablecloth yet? I started this ongoing project with my kids last year. It is a gift to my future self. Reading aloud to my children has been and still is one of the most simple and deepest bonding experiences I have been privileged to be apart of. It is a visual record of our reading time together. Even now just a year later, Im filled with so much joy remembering these stories and how we loved them.

Link in profile for anyone interested in starting one of their own. #readaloud #embroidery #book #booktablecloth #charlottemasonirl #handicraft #homeschool
Last month we closed on a 1923 island cottage on a Last month we closed on a 1923 island cottage on about 4 acres. We just visit for now, but when we do our hearts are so filled. Chickens and goats forthcoming. ❤️
For 2019 books read: Jacks 84, Savannah 92, and An For 2019 books read: Jacks 84, Savannah 92, and Annie 25. They are already setting reading goals for 2020 😍
Savannah celebrated her 11th birthday earlier this Savannah celebrated her 11th birthday earlier this month and I sort of dropped the ball on posting, but I couldn’t let December wrap up without saying something about my precious daughter. This girl right here is next level. She’s the girl who snuggles her bunny, even after he bit her moments before. She is unwavering in her love. She’s the girl who while stirring the rice, spills it all over the counter, but happily scoops it up and declares, “free samples!” She sees the good. She is non stop laughter. She is LOUD, people. She spends hours painting cards for others and if you’ve been blessed to receive one from her, it’s her whole heart on paper. Give her a cheeseburger and a book to read outside and you can call it good. She’s an absolute light in this dark world. I don’t deserve her, but thank you God for your graces and blessing me so. Happy 11th birthday, Savannah Smiles! ❤️
We bailed on a traditional Thanksgiving this year We bailed on a traditional Thanksgiving this year and instead feasted on the beauty of the Ten Thousand Islands. We explored the driftwood forests and found several rare shells. There were plenty of live shells to observe and Scruffy kept retrieving them from the water, but none were harmed. We found several washed up crab traps and the kids worked hard to rescue a stone crab who would have soon died like its cage-mates if not for their efforts. It was a Thanksgiving to remember for sure and I’m incredibly thankful everyday that we live in this wonderland of Florida. ❤️❤️❤️
follow on instagram
This error message is only visible to WordPress admins


Recent Posts

  • Soap Bottle Dolls May 4, 2020
  • A Book Tablecloth February 18, 2019
  • Book Party: Where the Red Fern Grows (Spoilers) February 1, 2019
  • An Artful Approach to Mapmaking January 29, 2018
  • Egg Crate Foam Puppet Box… May 30, 2017
  • Rookery Bird Swamp… May 19, 2017
  • Confetti Moon Valentines… February 1, 2017
  • A Hike in the Woods… December 30, 2016
  • Enchanted Tree Stumps… November 7, 2016
  • Chocolate Covered Clementine Pumpkins… September 24, 2016
  • Painting… September 3, 2016
  • Giant Paper Mache Moon… August 1, 2016
  • Soft Pretzel Letters… July 7, 2016
  • Camp Banners… July 5, 2016
  • Wyatt turns 1… June 20, 2016
  • Make Your Own Chewing Gum Kit… May 24, 2016
  • Paper Mache Prize Ribbons… May 12, 2016
  • Mote Marine… April 25, 2016
  • Highlight Reel… April 12, 2016
  • Cardboard and Embroidery Necklace… March 17, 2016
  • Tea Box Veggie Garden… March 8, 2016
  • Start Creative Doodle Books… March 4, 2016
  • Yarn Birds… February 15, 2016
  • Snail Pin Valentines… January 20, 2016
  • Faux Taxidermy Ornaments… November 6, 2015
  • Classic Cream Puffs… September 21, 2015
  • Handprinted Stationary Kit… August 31, 2015
  • DIY Confetti Blowers… August 14, 2015
  • Easy Broccoli and Cheese Quiche… July 15, 2015
  • Time with Annie… March 8, 2015
  • School on Captiva Island and the Best Beach Bucket… February 17, 2015
  • Yarn Wrapped Lollipop Valentines… February 12, 2015
  • A New Addition… February 6, 2015
  • Artful Blogging Magazine Feature… November 13, 2014
  • The Road to Homeschooling… November 5, 2014
  • Handmade Confetti Ghosts… October 27, 2014
  • We Made: Kid Art Pumpkins… October 20, 2014
  • Chocolate Trail Mix Lollies… October 6, 2014
  • In Search of a Passion Fruit Vine… September 28, 2014
  • Back to School… September 14, 2014
  • One Day I’ll Remember… September 5, 2014
  • We Made: Pom Pom Ponytail Holders… August 23, 2014
  • Catching A Katydid… August 19, 2014
  • Family Favorite Snacks: Chocolate Strawberry Sorbet Bars August 18, 2014
  • Happy 7th Birthday Jacks… August 11, 2014
  • Another Monarch Release… July 18, 2014
  • Kid Embroidered Pencil Pouch… July 11, 2014
  • Family Favorite Snacks: No Guilt Almond Joy Bites… July 9, 2014
  • Personalized Watercolor Postcards… July 2, 2014
  • Published In Mingle… June 29, 2014

Footer

Copyright © 2026 · Foodie Pro & The Genesis Framework