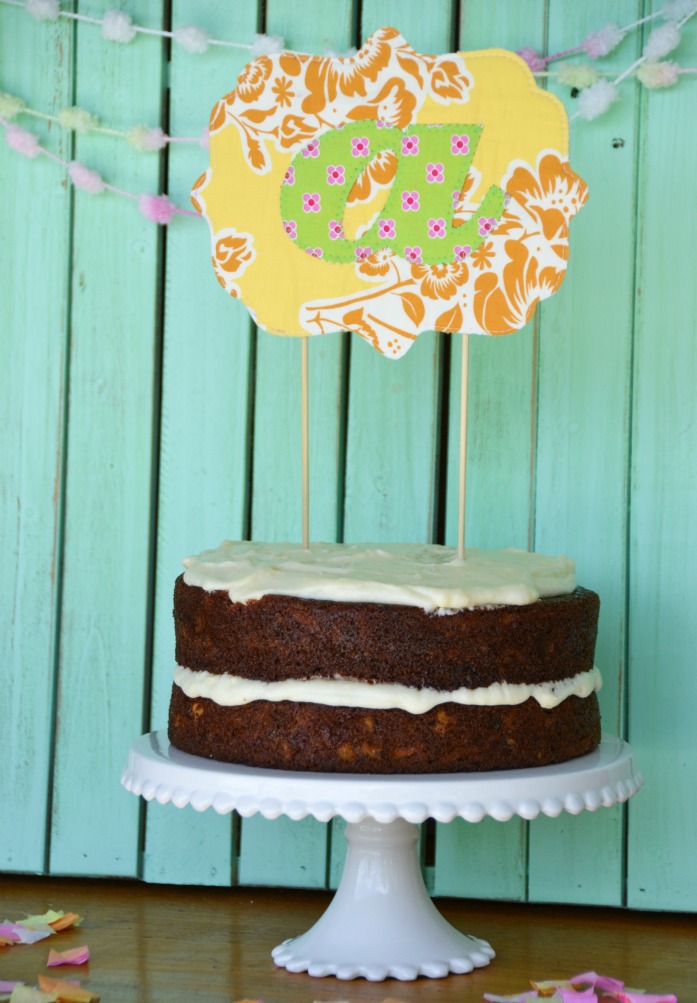
Are y’all sick of appliqué projects yet? Serious…I have a million and one uses for appliqué, so I hope I’m inspiring you to get sewing! This week, I’m showing you how to make an appliqué cake topper. Really…how cute is this? There are sooooo many ways to personalize this project from birthdays to weddings. Also, it makes for a nice keepsake after the party’s over.
Supplies I used for this project:
Appliqué supplies {reference my appliqué tutorials here and here for a supply list and complete how to}
Binding
Bamboo skewers
Sewing marker
Scissors
Dingbat template {kut ups}
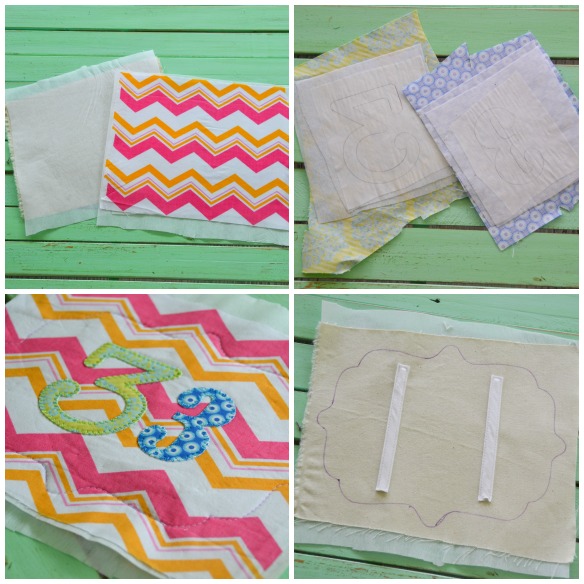
Cut two pieces of scrap fabric, equal size.
Iron 2 pieces of interfacing to both the front and back fabrics.
Trace appliqué {in the reverse} on wonder under or heat n bond.
Trace template on right side of front fabric using a sewing marker.
Cut out appliqué and center them on right side of fabric.
Iron appliqué onto fabric and stitch down using a zig zag stitch {explained in part 2 of my tutorial found here} or a straight stitch.
Trace template on right side of back fabric using a sewing marker.
Cut 2 pieces of binding {4-5 inches} in length.
Center on fabric and stitch down, leaving a small opening at the bottom of each.
Keeping the fabrics wrong side together, hold the topper up to a light and center the binding pieces with the appliqué.
It’s important to make sure you have equal sizes of fabric on the front and back.
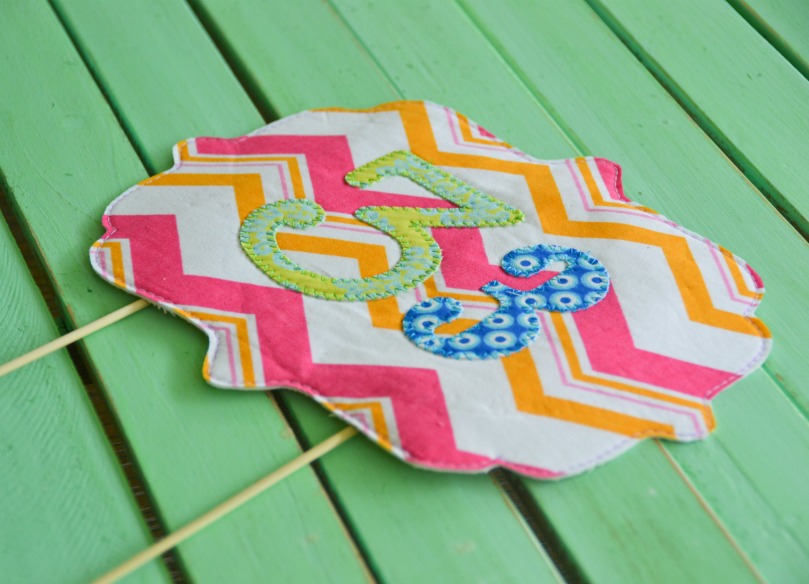
Using the template you traced as a guide, straight stitch around the entire topper.
Leaving a small edge, trim around the perimeter of the topper. Careful not to cut your stitching.
Insert bamboo skewers and place on cake.
I briefly thought about making these and selling them in my Etsy shop. However, I decided I would rather show you how to make them first. So, will you make one for your next party? If you do, send me pics! I love to see my tutorials put into action. If you have any questions, just leave a comment!